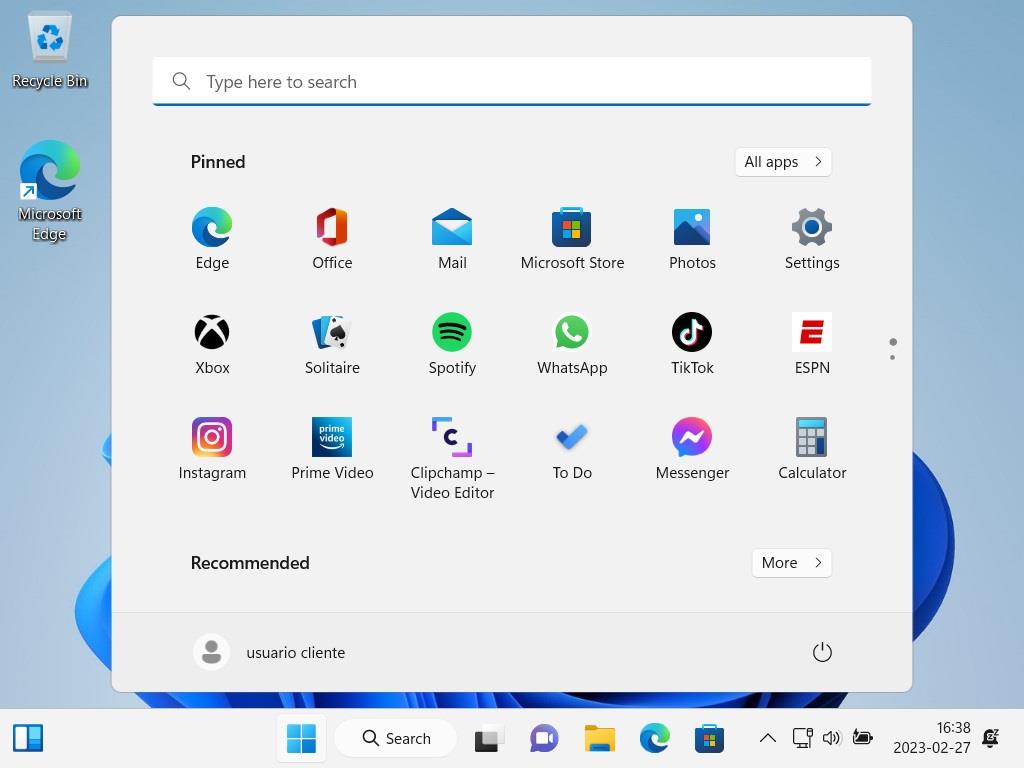
How do I install Windows 11?
There are two methods for carrying out the installation:
Upgrading from Windows 10
- For this, we recommend using the Microsoft upgrade tool called Windows 11 Installation Assistant, Download it for free here.
- Once you have downloaded the tool, you may need to install PC Health Check if it prompts you to do so.
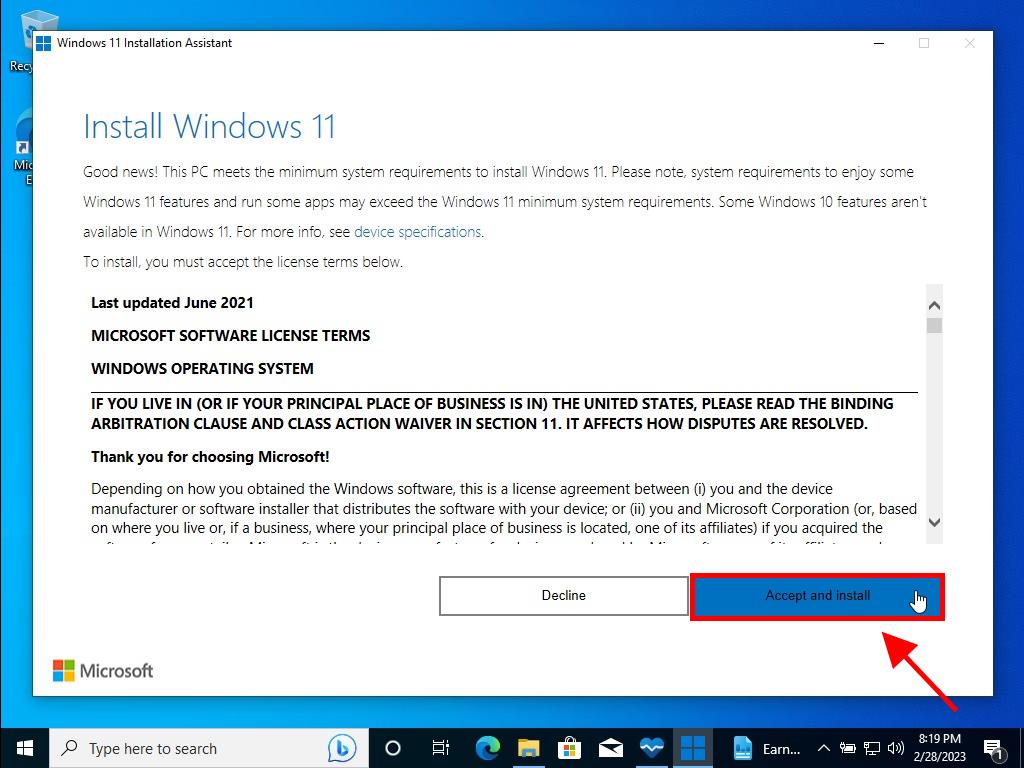
- Accept the terms and conditions of use.
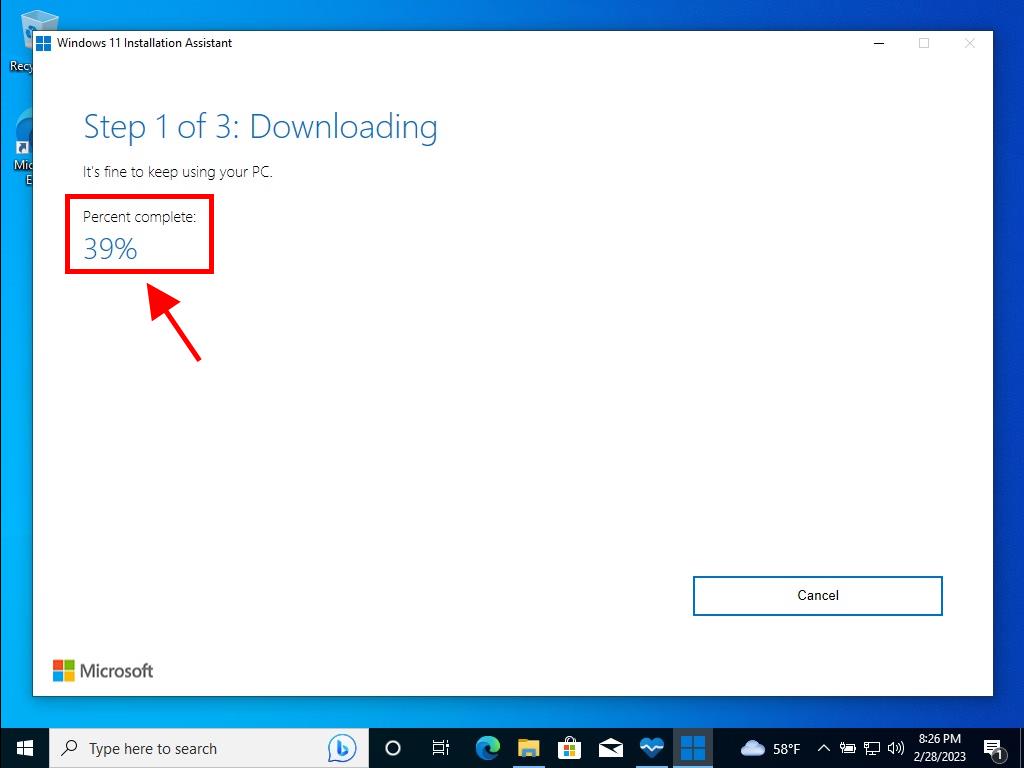
- Next, the download and installation of Windows will begin automatically.
- Once the download is complete, you can choose whether or not to restart your computer, but you must do so within a maximum of 30 minutes.
- Once you have restarted your PC, you can refer to the guide Installing Windows 11 from scratch below to see the step-by-step setup instructions.
Installing Windows 11 from scratch
Note: You should bear in mind that the process can vary greatly depending on your PC.
Connect the USB to carry out the following process:
- Restart your PC and, when the manufacturer's logo appears, look for the BOOT menu key, which is usually F2, F10, F11, F12, or Del, to open the menu and change the boot order to USB.
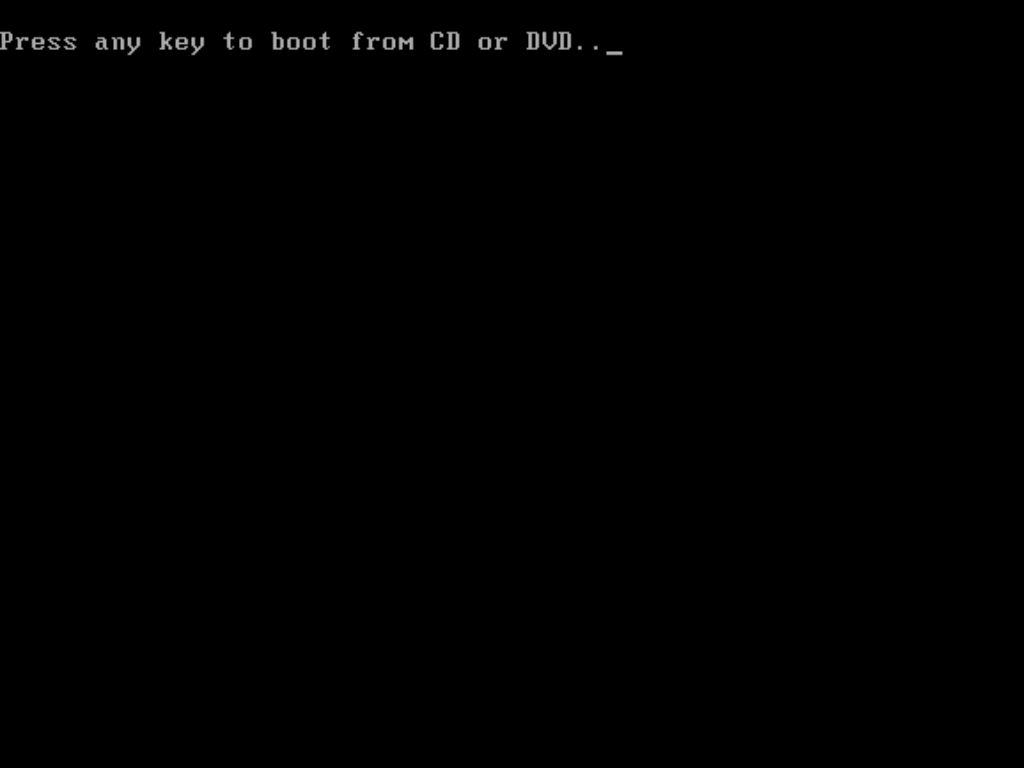
- After restarting your PC, you will see a screen that says Press any key to continue from CD or DVD.
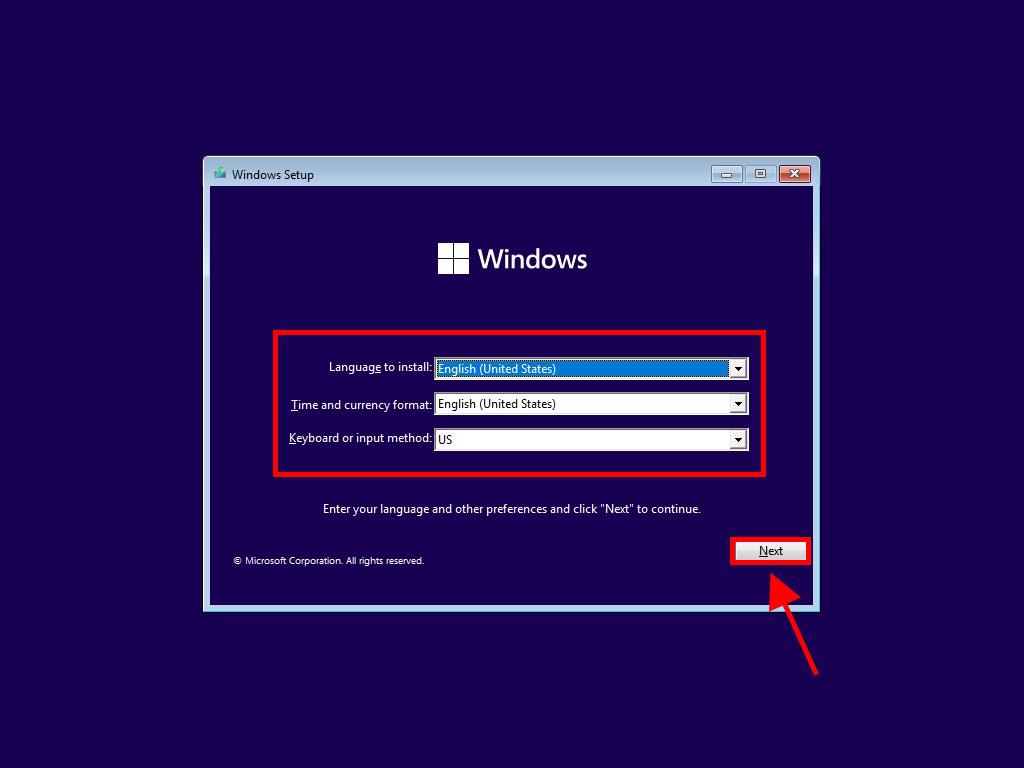
- Once you're in the setup program, select your language, time format, currency, and input method, and click on Next.
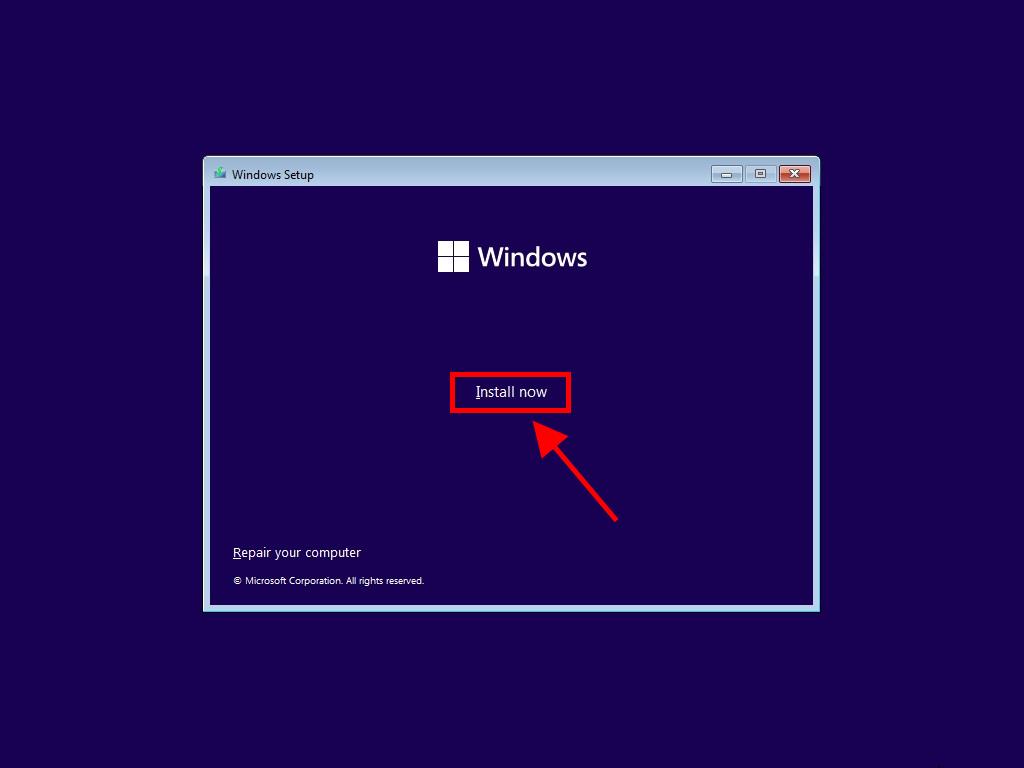
- Click on the Install now button.
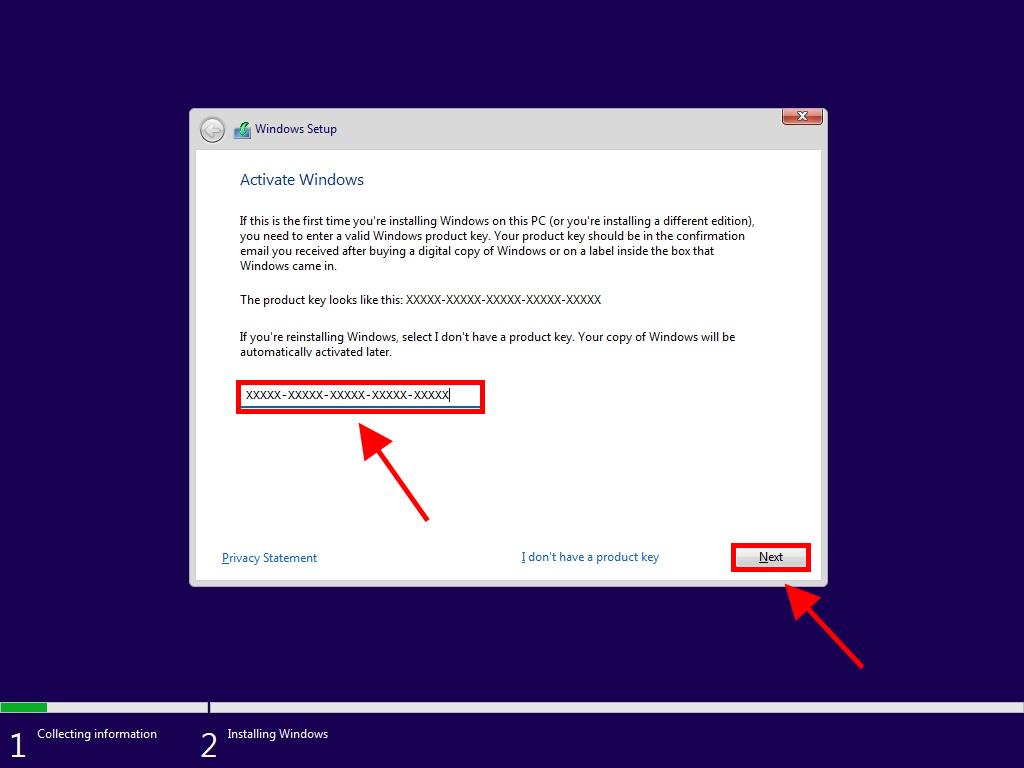
- Next, enter your Windows 11 product key and click on Next.
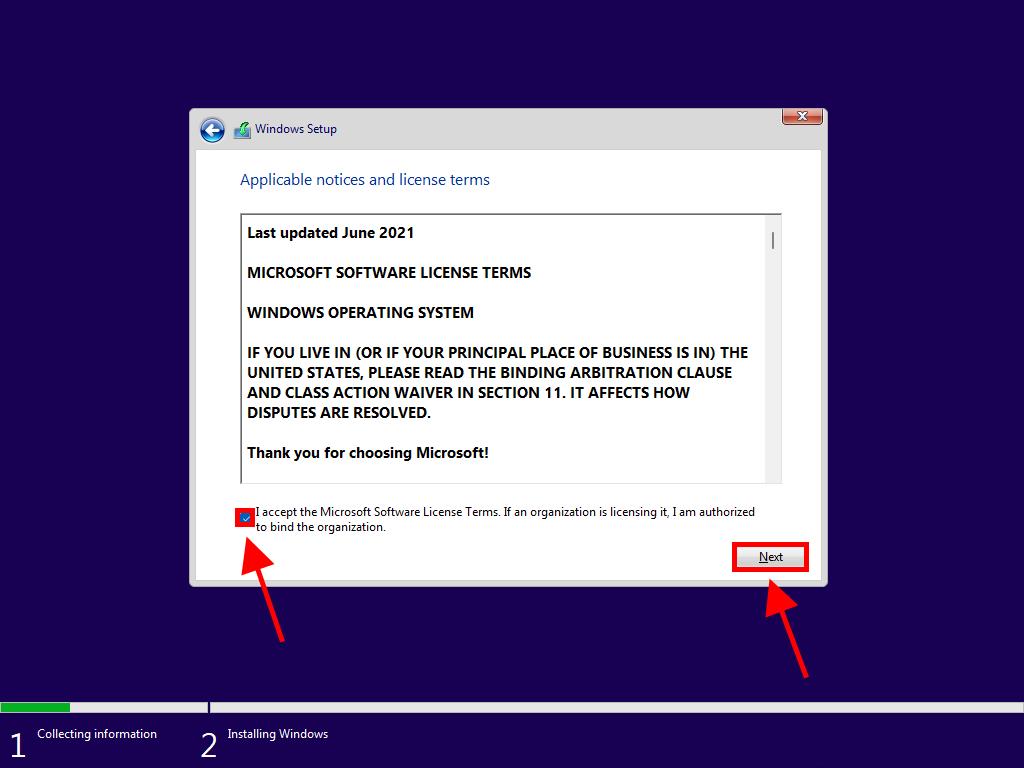
- Read and accept the Windows 11 licence terms by ticking the box. Click on Next.
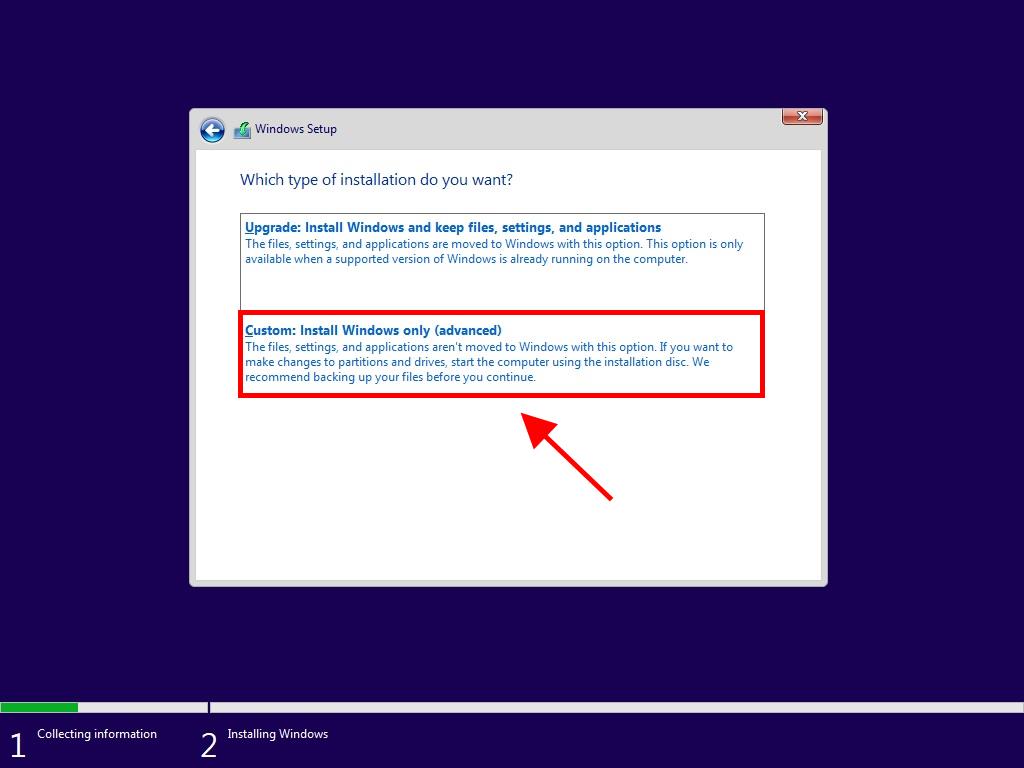
- On the next screen, select Custom: Install Windows only (advanced).
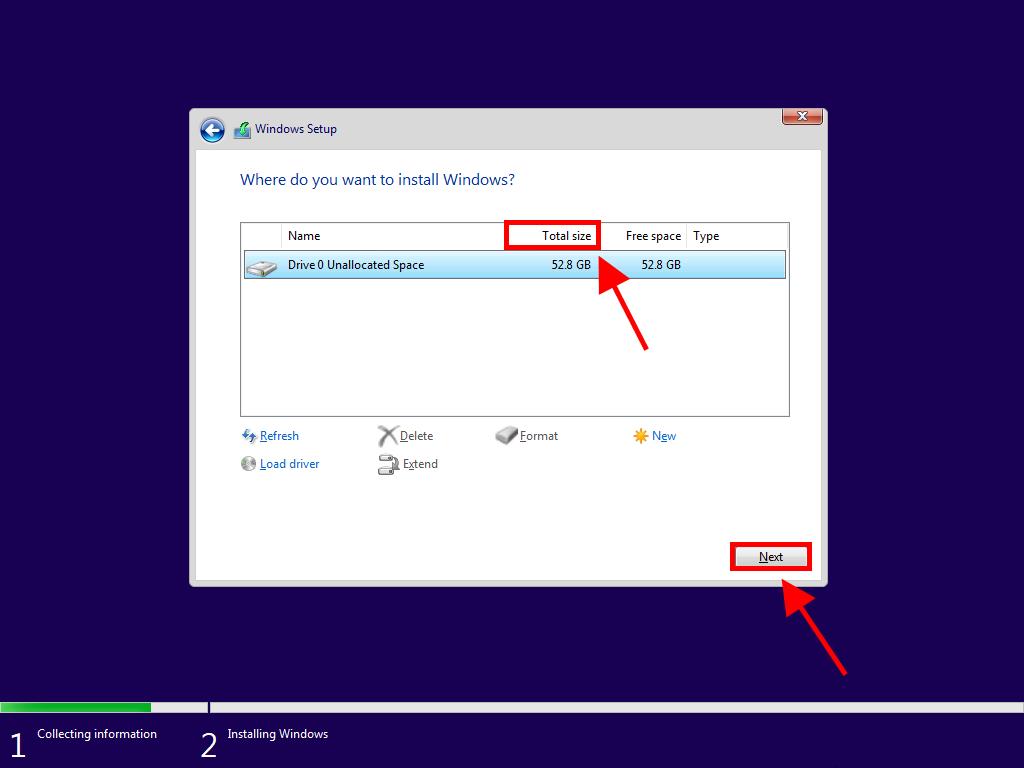
- In the following box, select the drive where you want to install Windows 11 and click on Next.
- Windows will now begin to install on your PC.
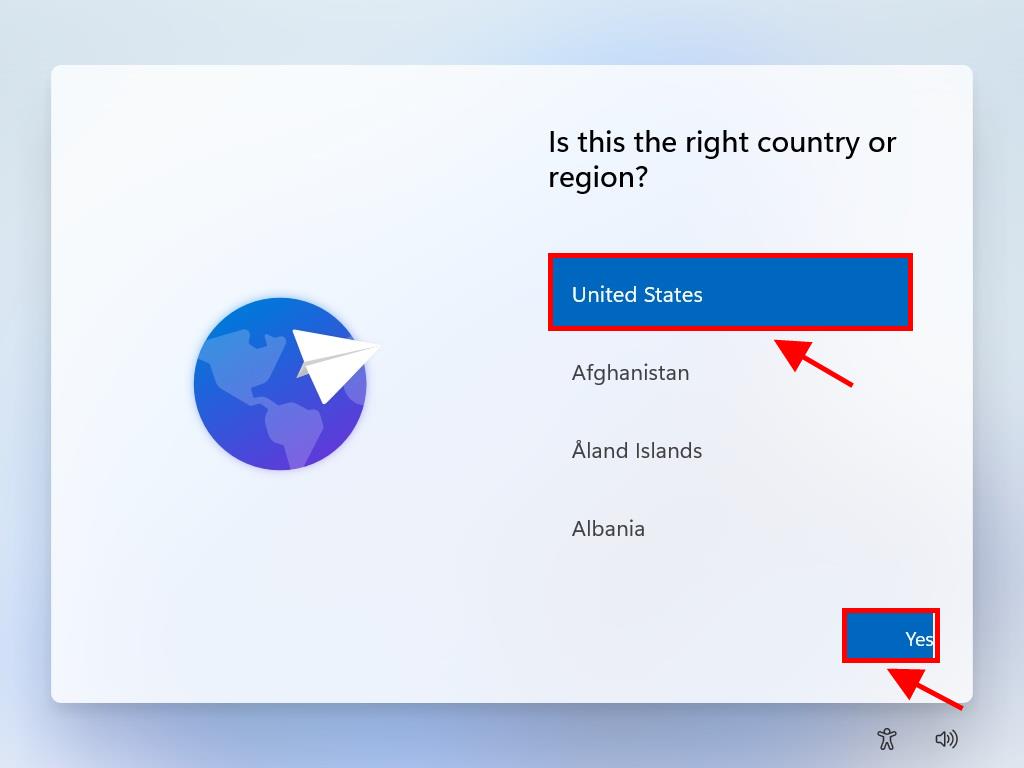
- In the next box, select your region and click on Yes.
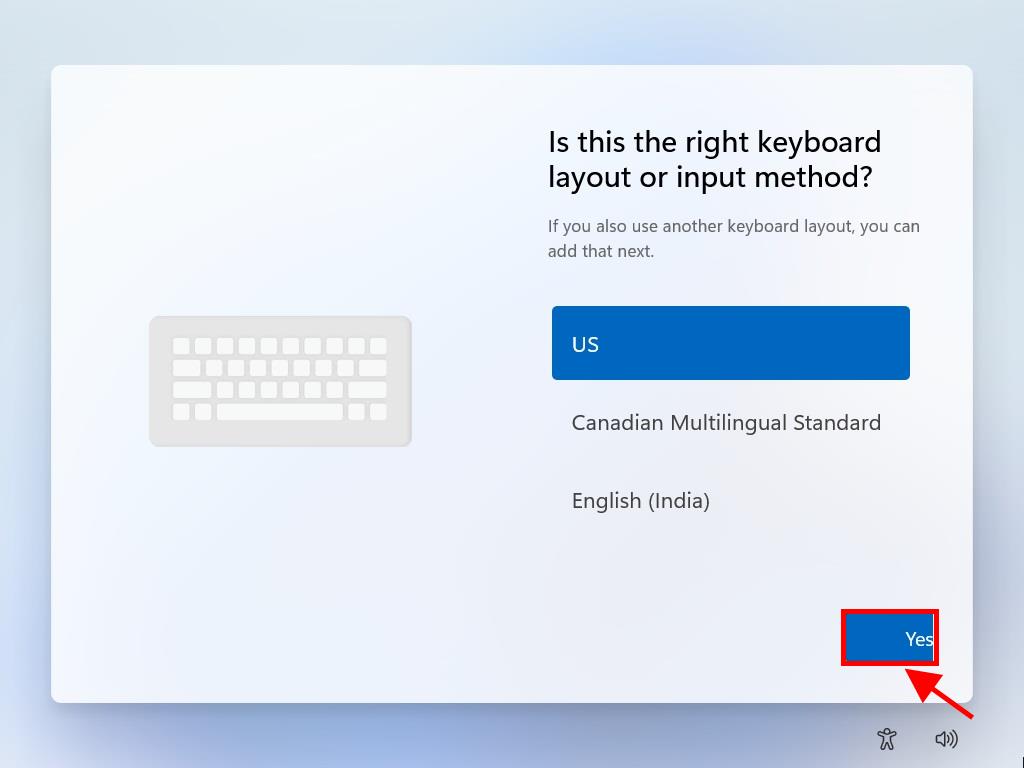
- Next, select the keyboard based on the region you chose and click on Yes.
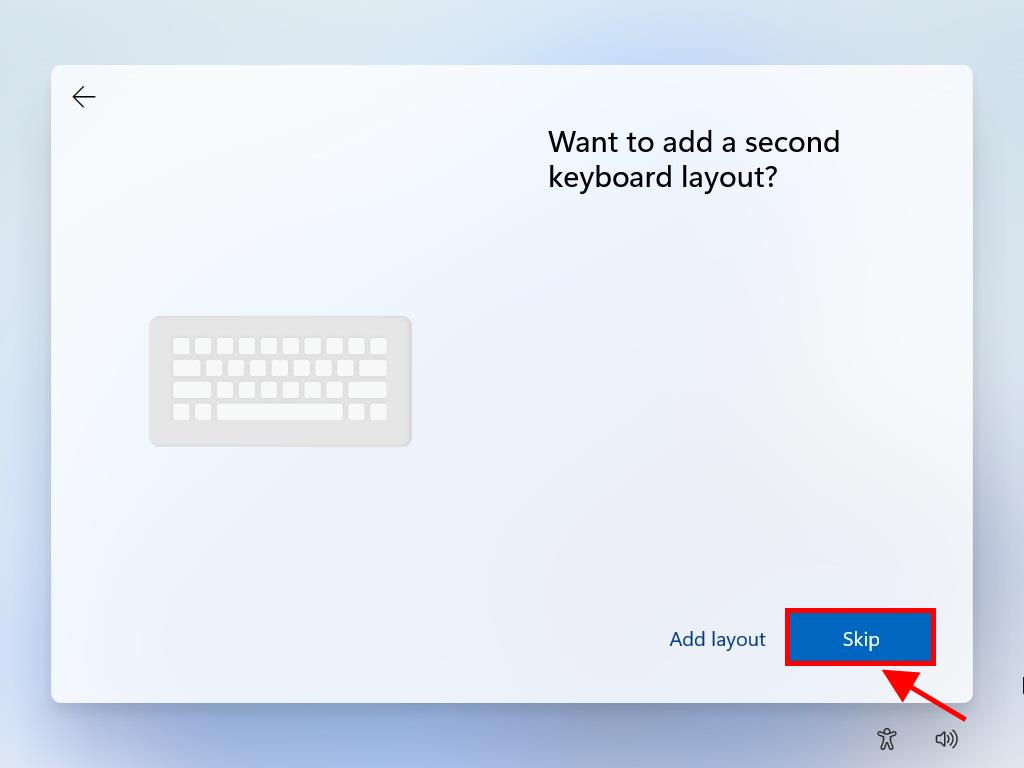
- Click the Skip button if you don't need to set up a second keyboard layout. The PC will automatically connect to the network if using a wired internet connection. If you have a wireless connection, you'll need to set up the connection manually (a security key might be required).
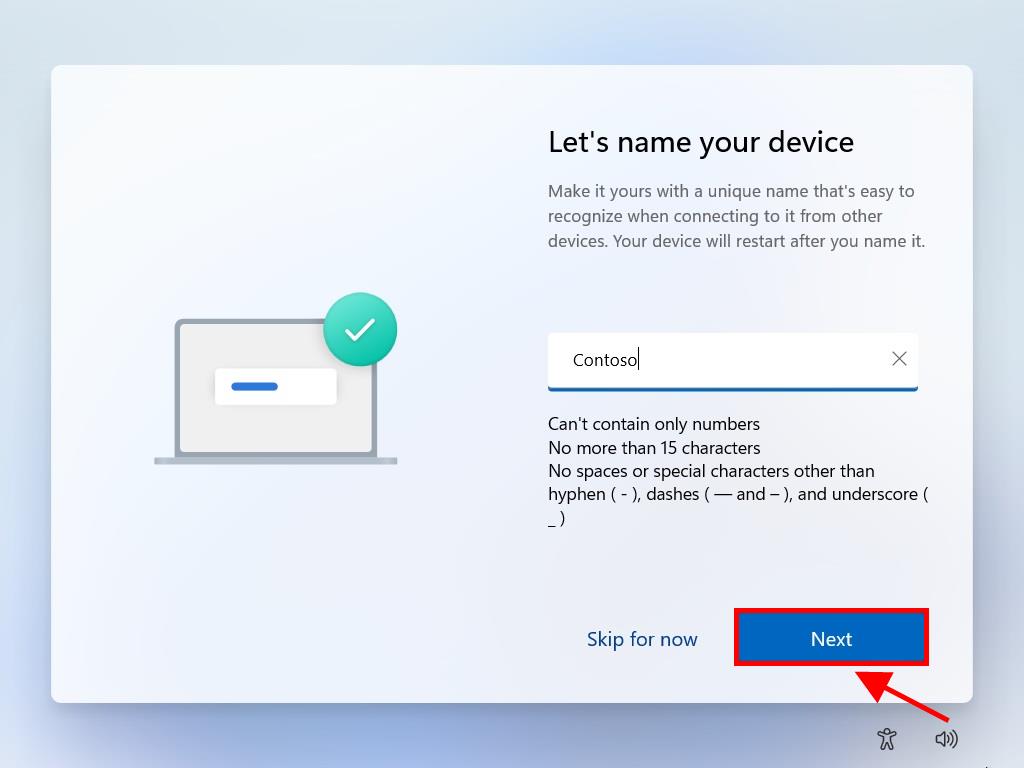
- In the following box, enter a name for your PC, then click Next.
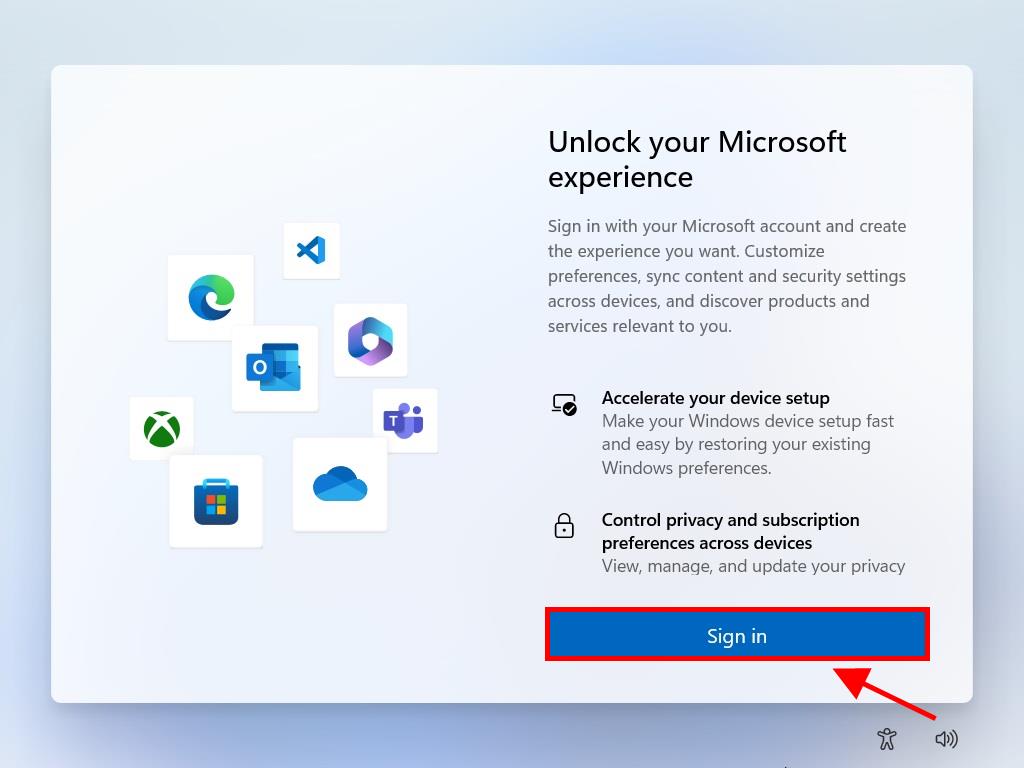
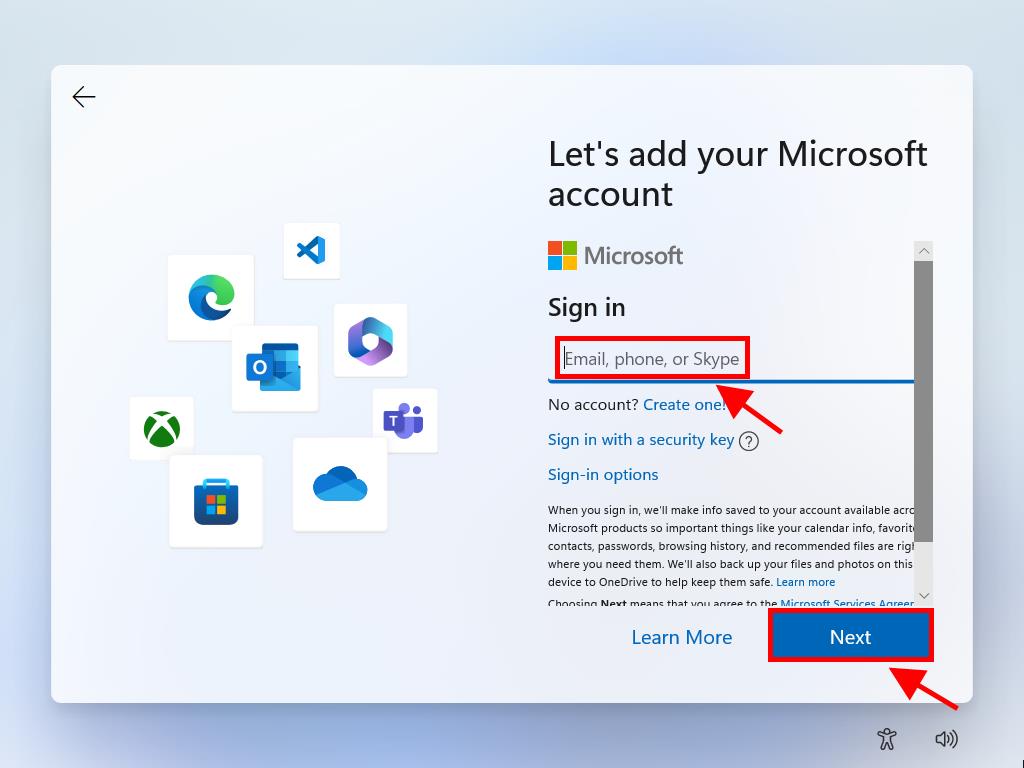
- In the section to unlock your Microsoft experience, click Sign in.
- Enter your email address and click Next.
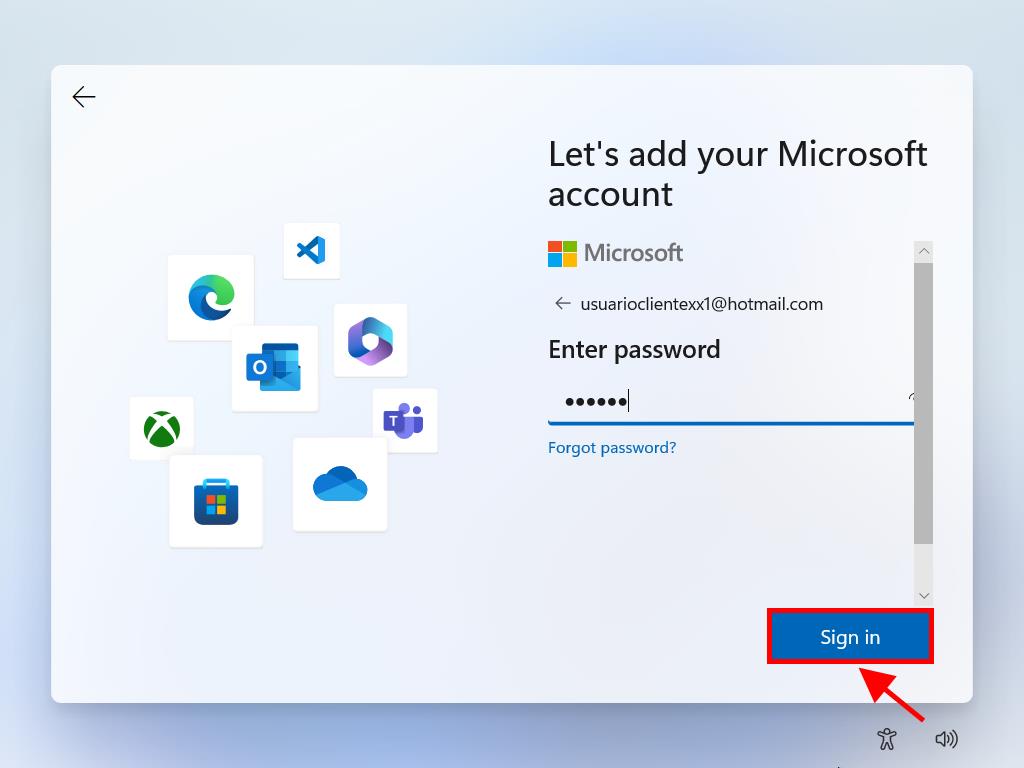
- Enter your password and click Sign in.
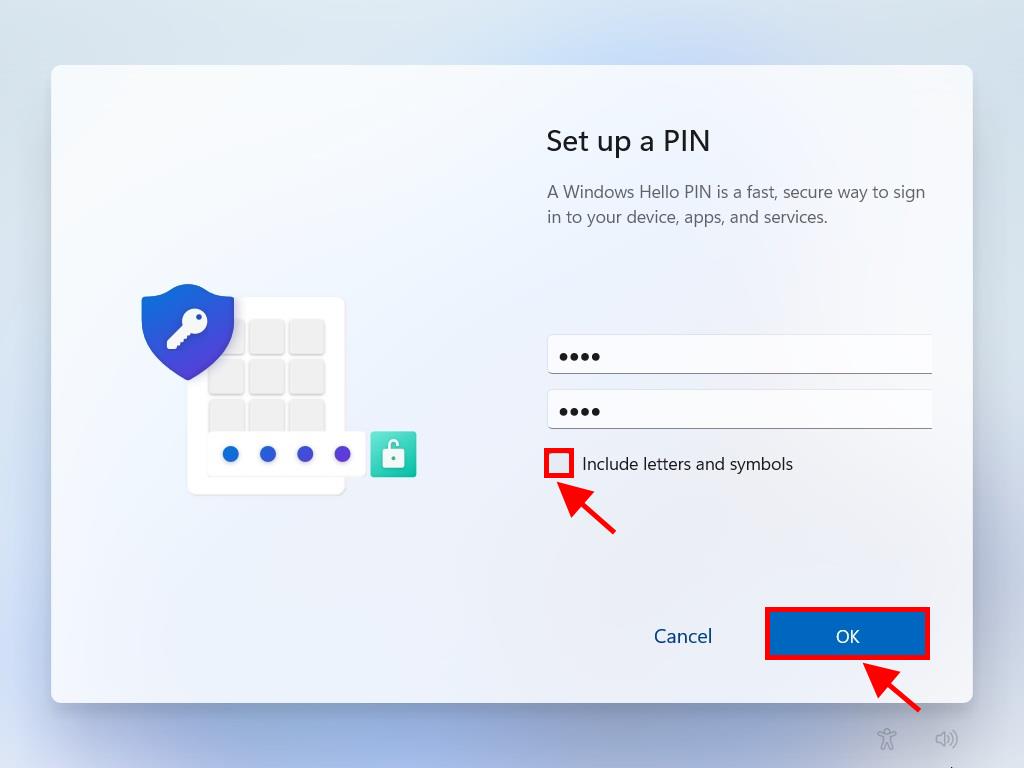
- Create a PIN that includes letters and symbols, tick the box, and click Ok.
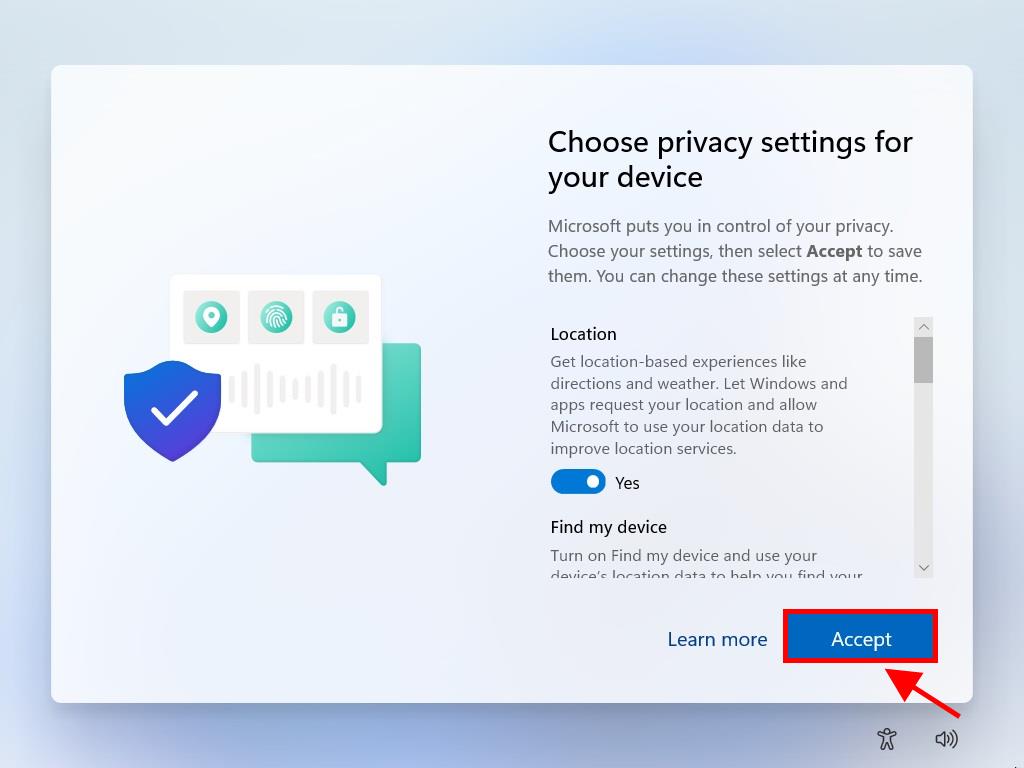
- In the privacy settings, click Accept.
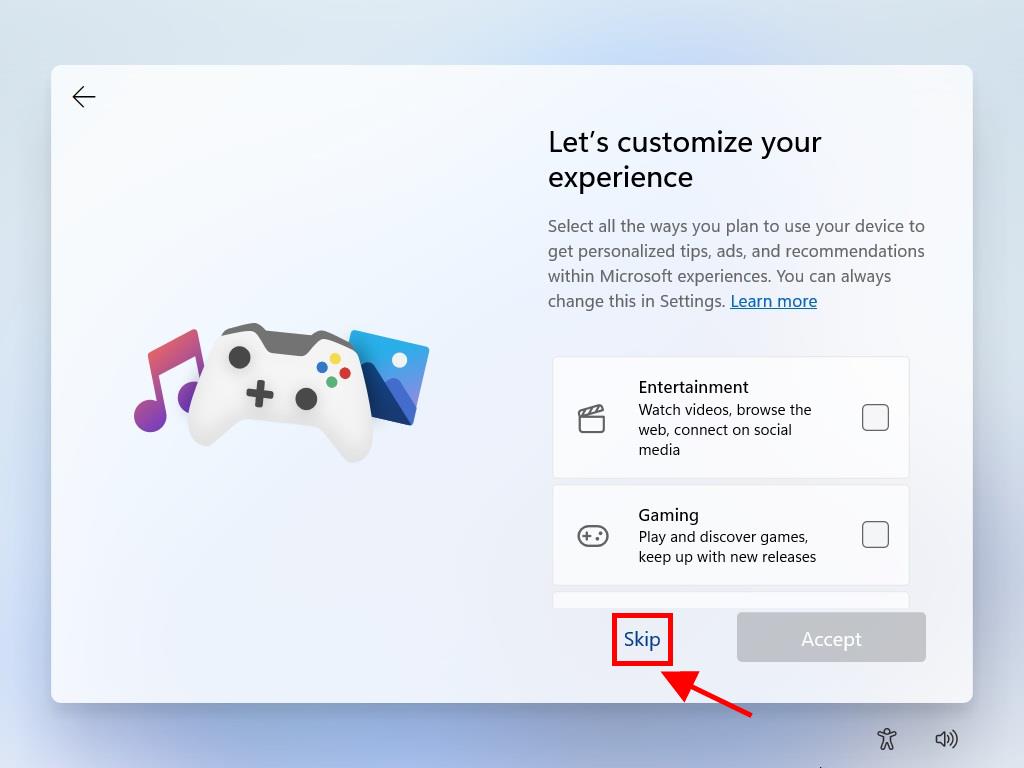
- In customising your experience, click Skip.
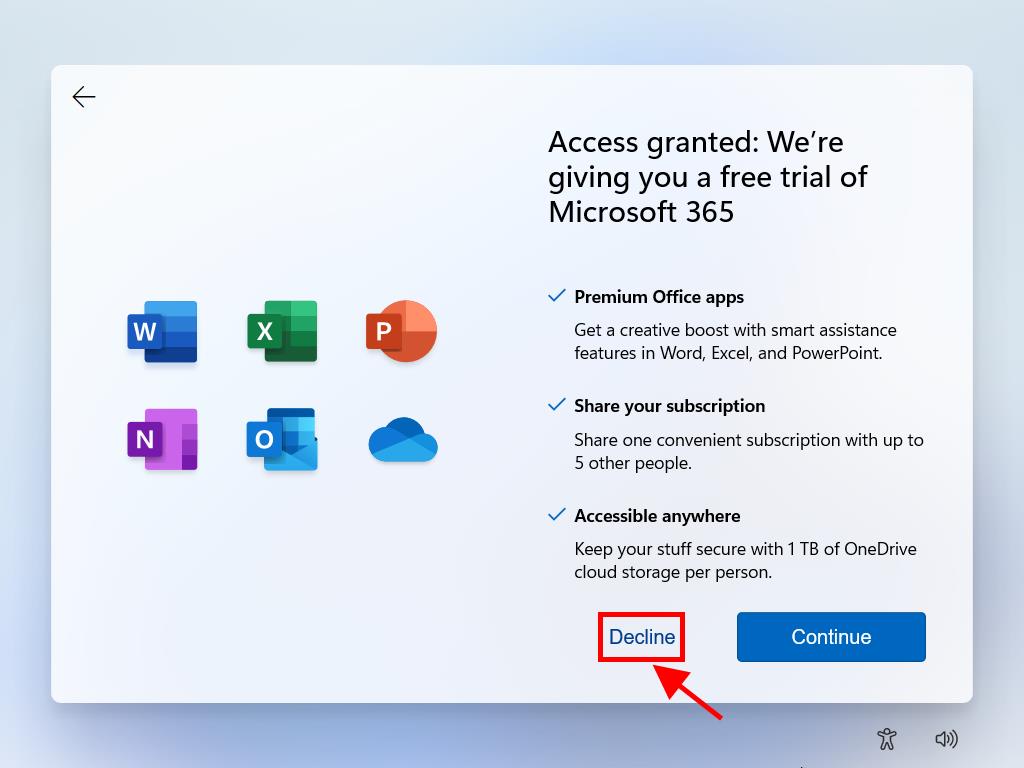
- Next, under Granted Access, click on Decline.
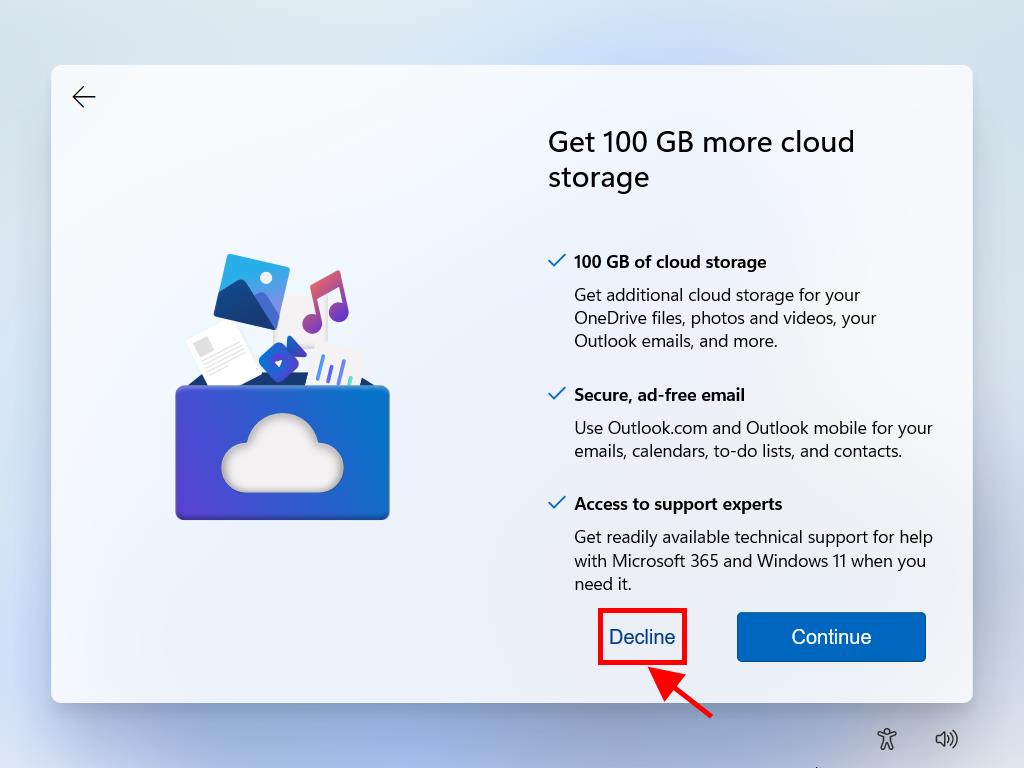
- Then, under Get 100 GB of cloud storage, click on Decline.
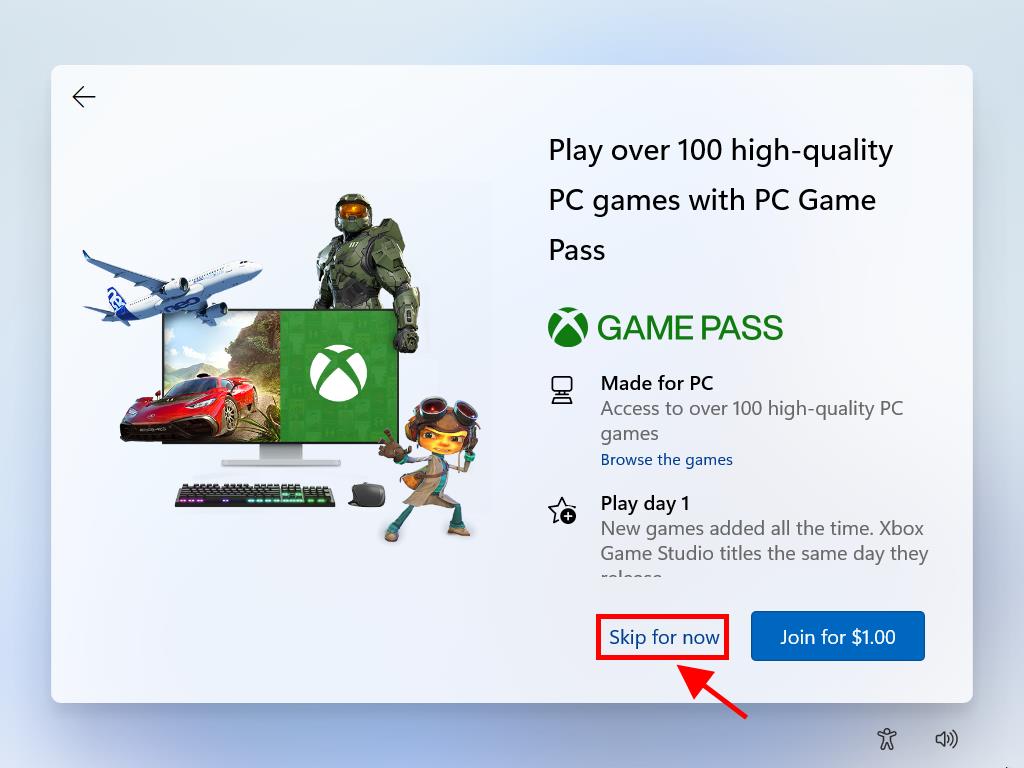
- Click on the Skip for now button to bypass the Game Pass subscription promotion.
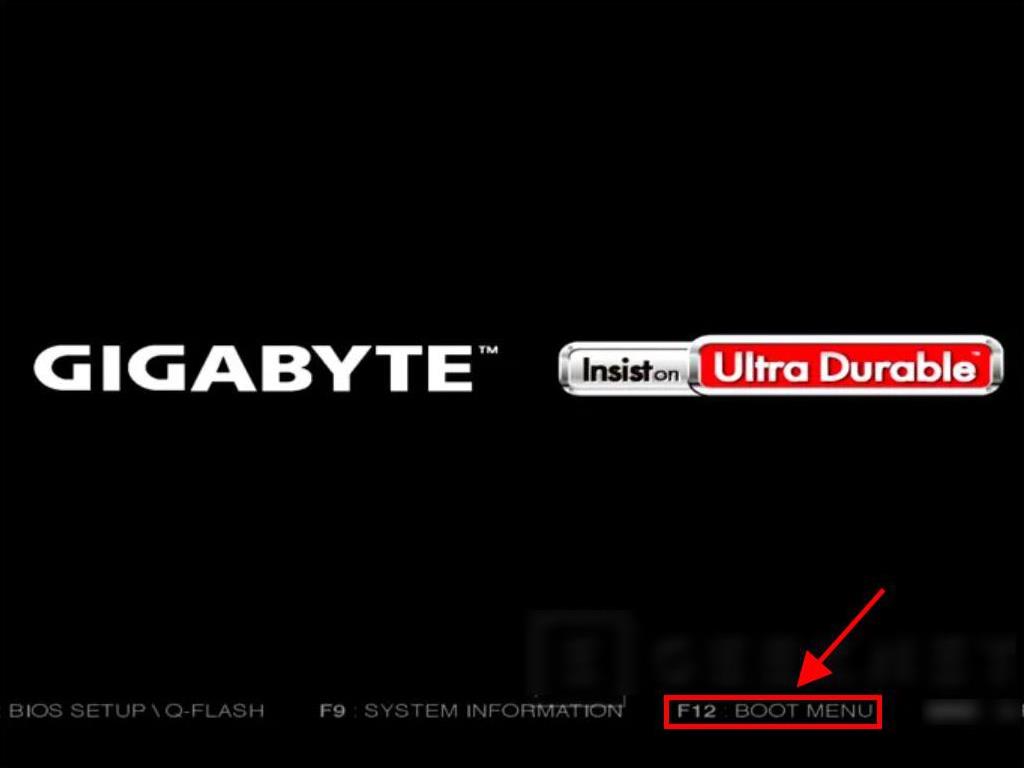
Note: The setup key may vary depending on your PC's model. At this point, your PC will indicate which key you should use.
Note: Make sure the USB appears as the primary device.
Note: To determine which hard drive to choose, look at the Total size column and select the hard drive with the most space in GB.
Note: If you wish, you can customise the settings to your liking.
Once you have completed the steps, Windows 11 will continue with the installation on the device. When finished, your PC will be ready for use, and you can enjoy the experience with your new software.
