How do I install Windows Server 2008 R2?
After creating a bootable USB drive, follow these steps to perform a clean installation:
- Turn on your server so that Windows starts normally; insert the Windows Server USB, and then restart the server.
- Your device will boot from the Windows Server USB device. Press any key when the message Press any key to boot from CD or DVD appears.
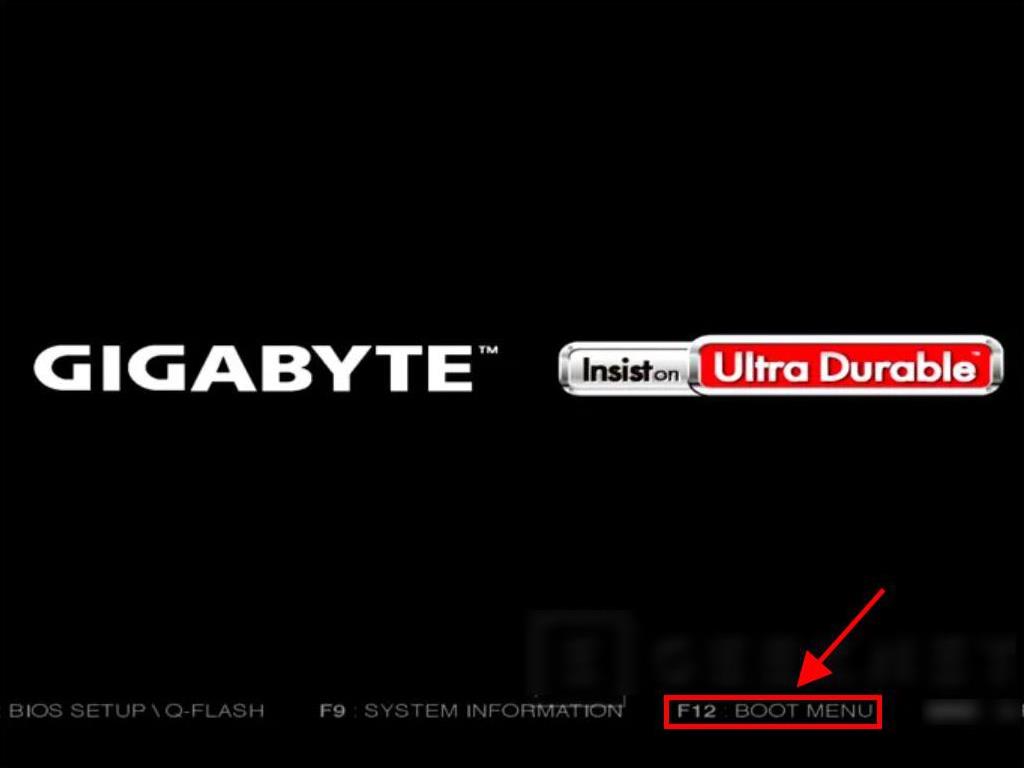
- Restart your PC, and when the manufacturer's logo appears, look for the BOOT menu key, which is usually F2, F10, F11, F12, or Del, to open the menu.
- Change the boot order to USB.
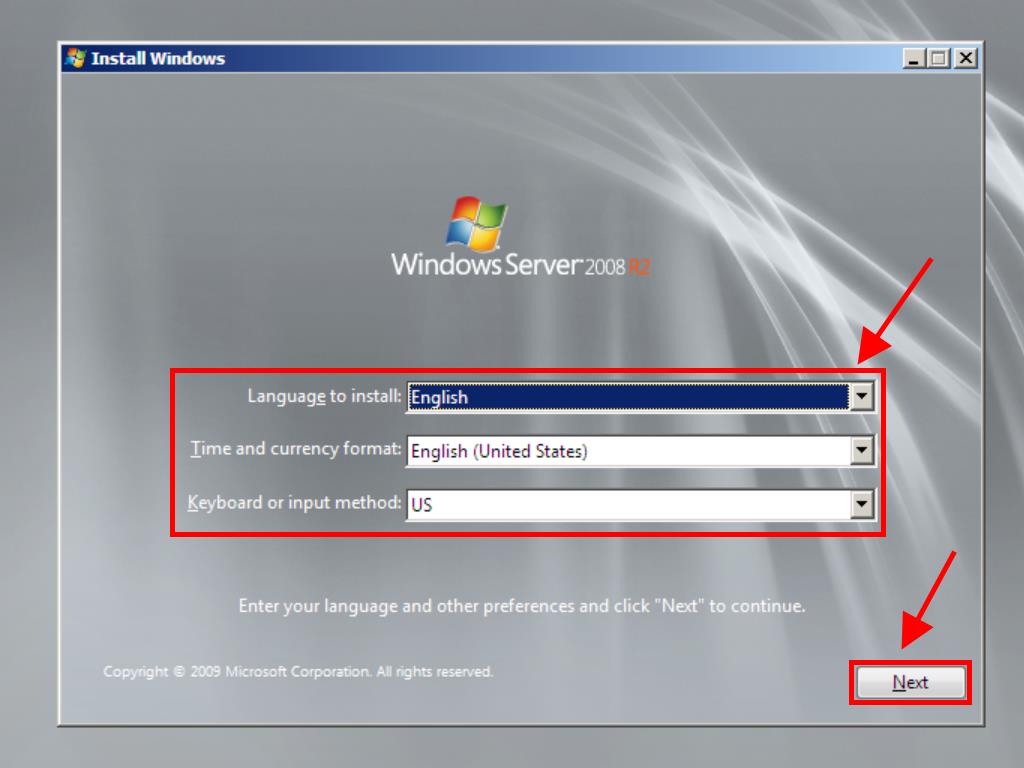
- Once you are in the setup program, select your language, time format, currency, and keyboard or input method, and click on Next.
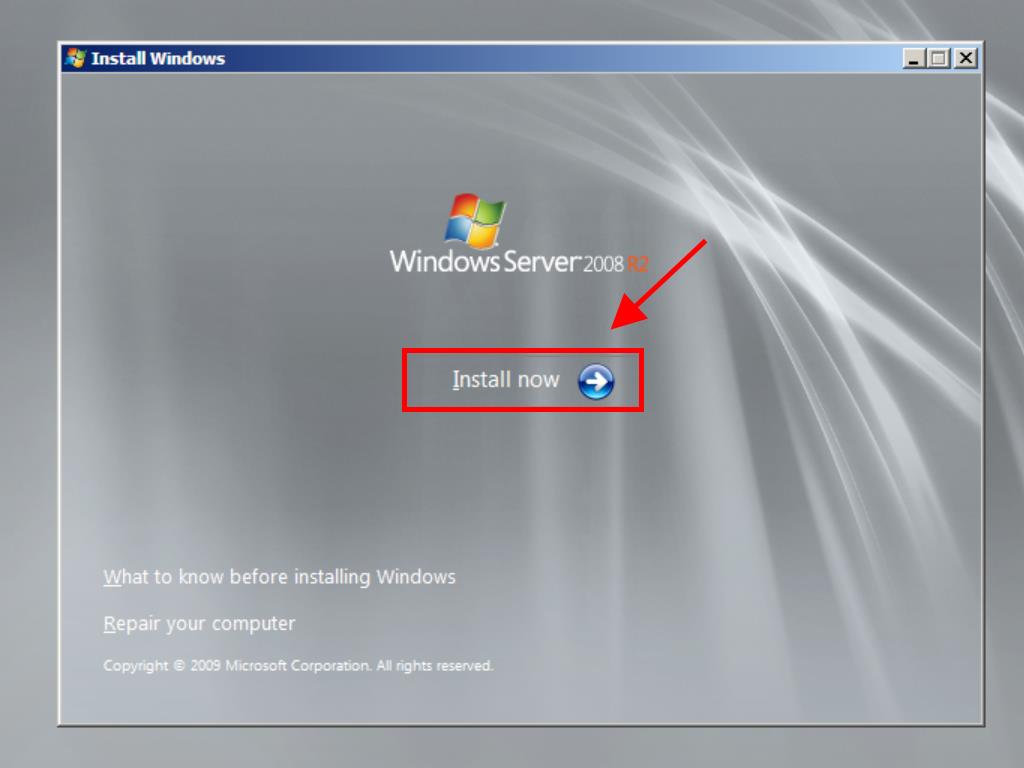
- Then, click on Install now to start the process.
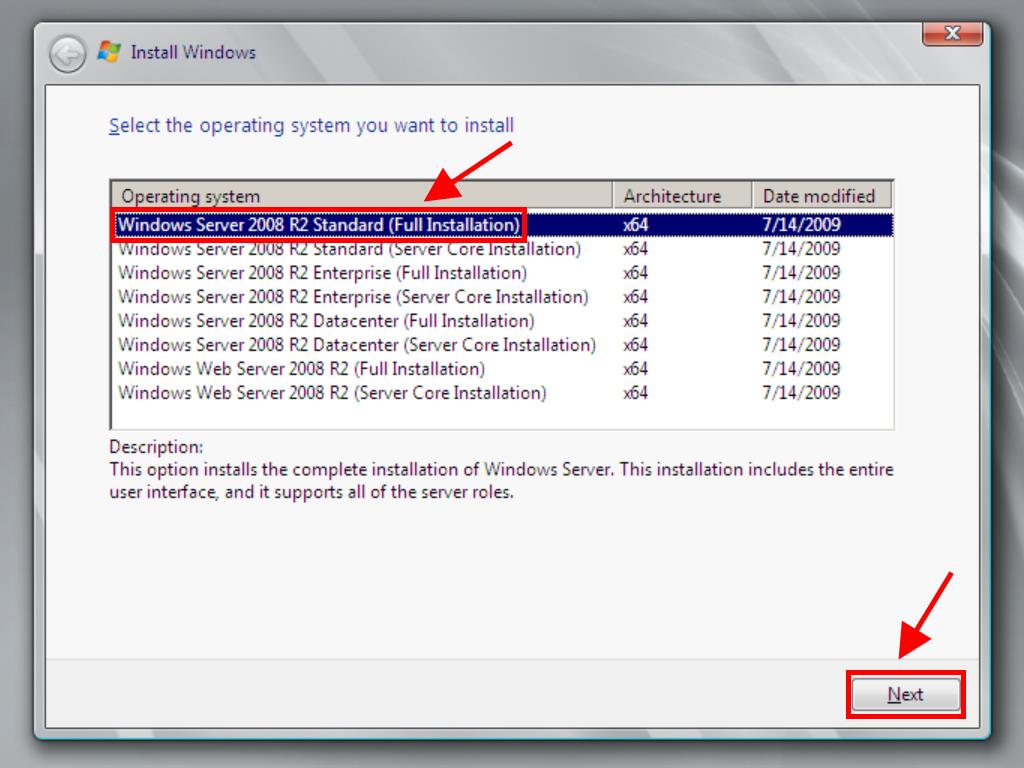
- Next, choose the edition of Windows Server you want to install (we recommend choosing the full installation). Then, click on Next.
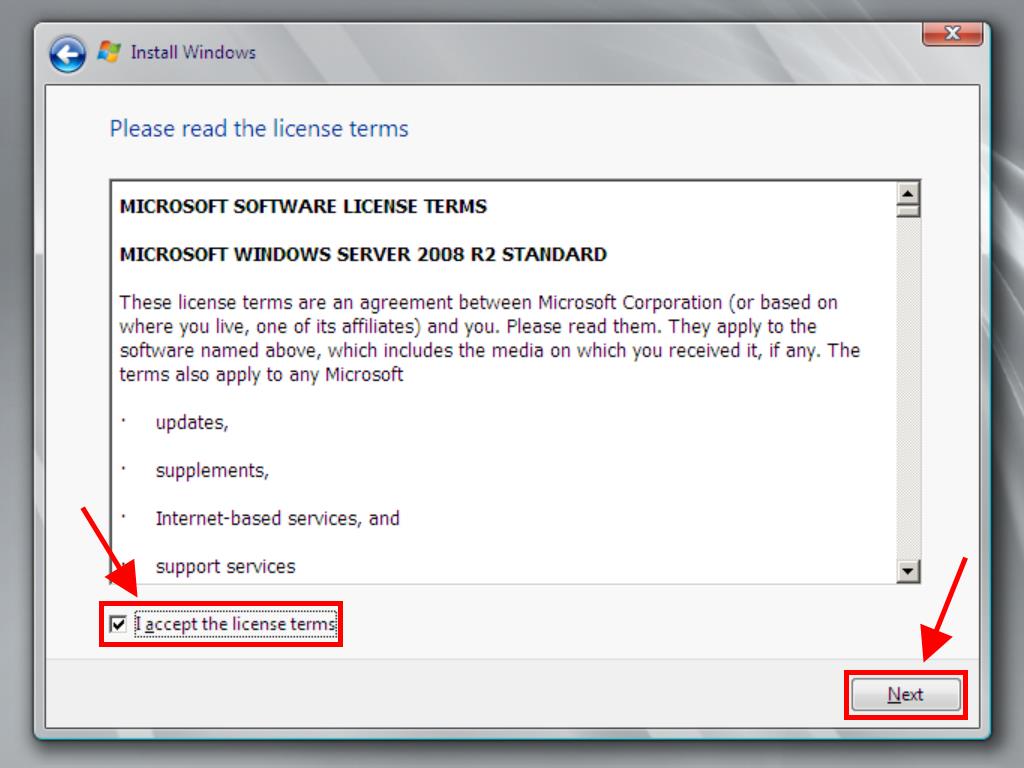
- Accept the license terms and click on Next.
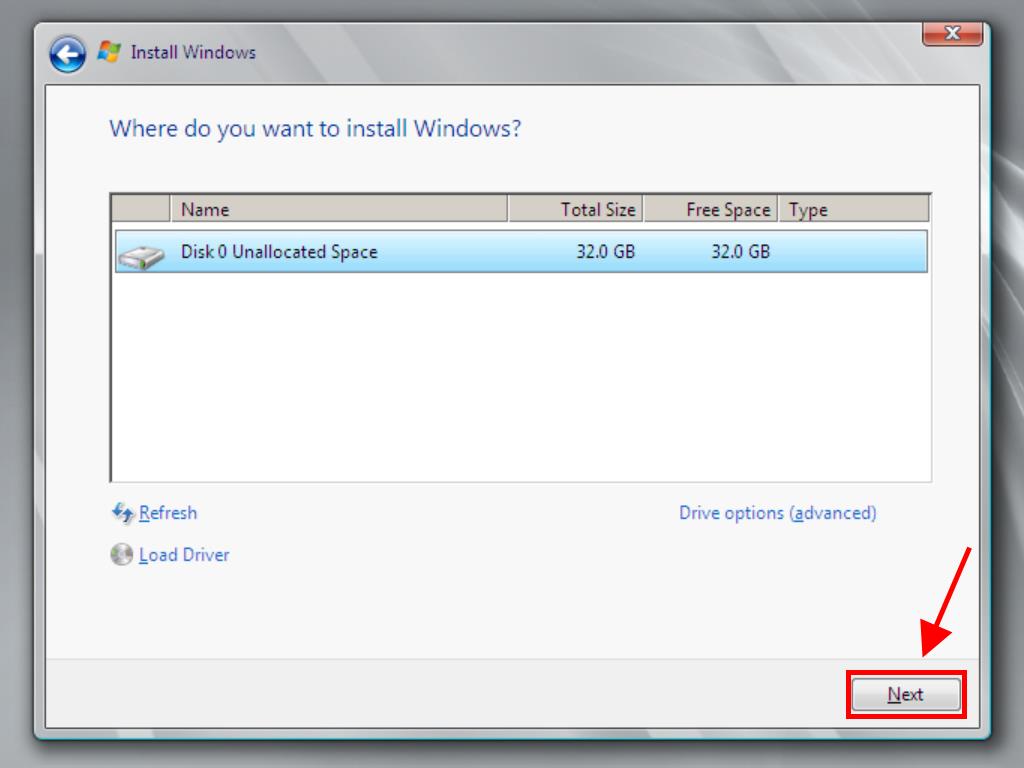
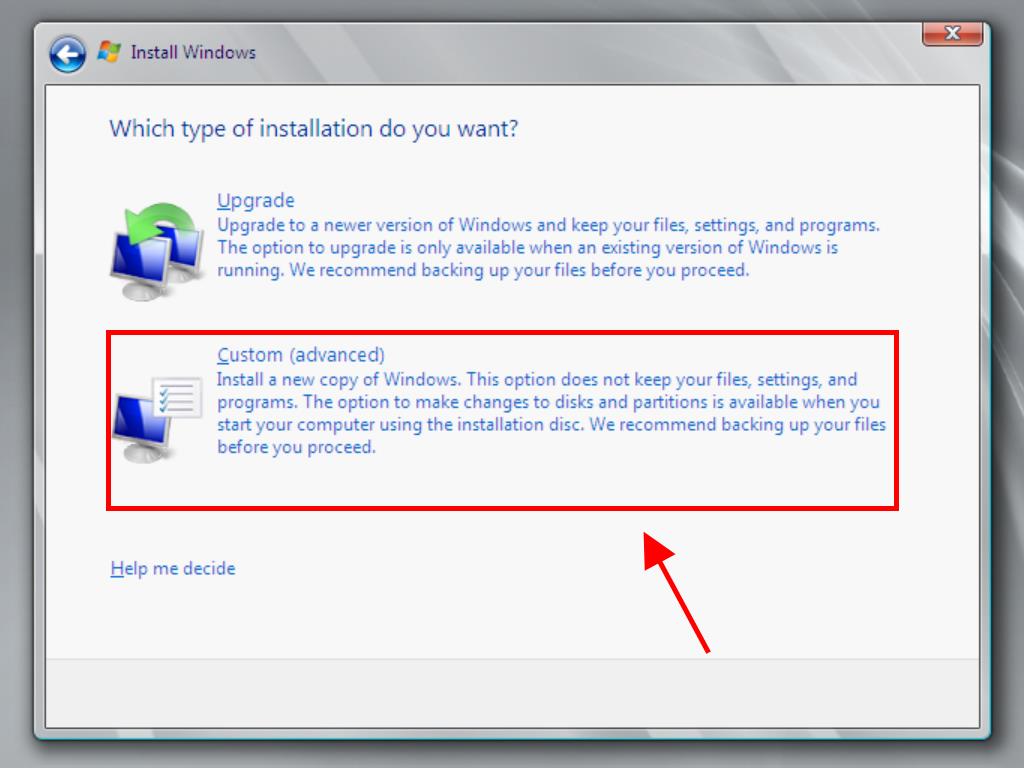
- In the next step, click on Custom (advanced).
- In the following box, select the hard drive where you want to install Windows Server and click on Next.
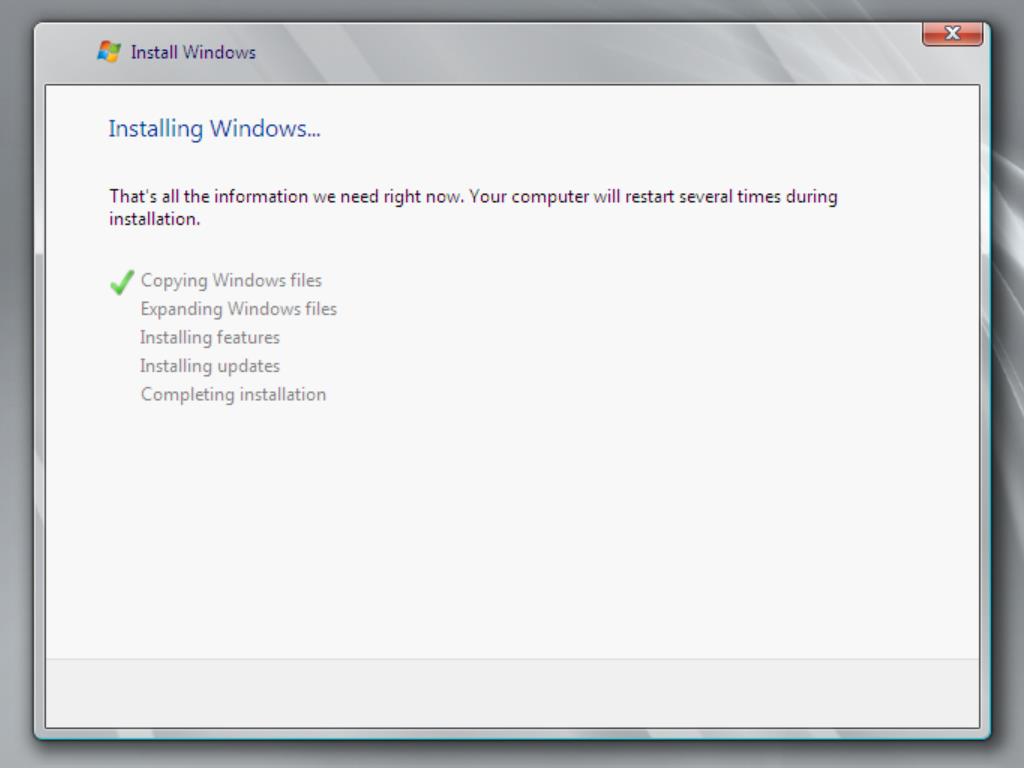
- The Windows Server installation will begin. This process will take a few minutes.
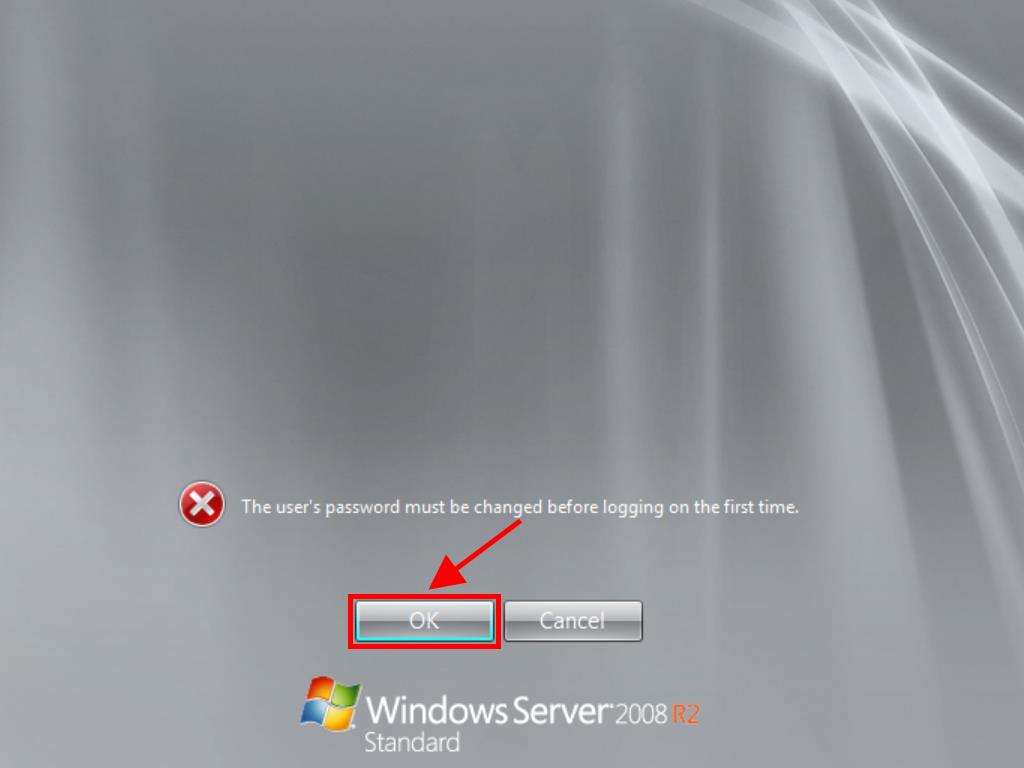
- Next, click on OK to enter a password.
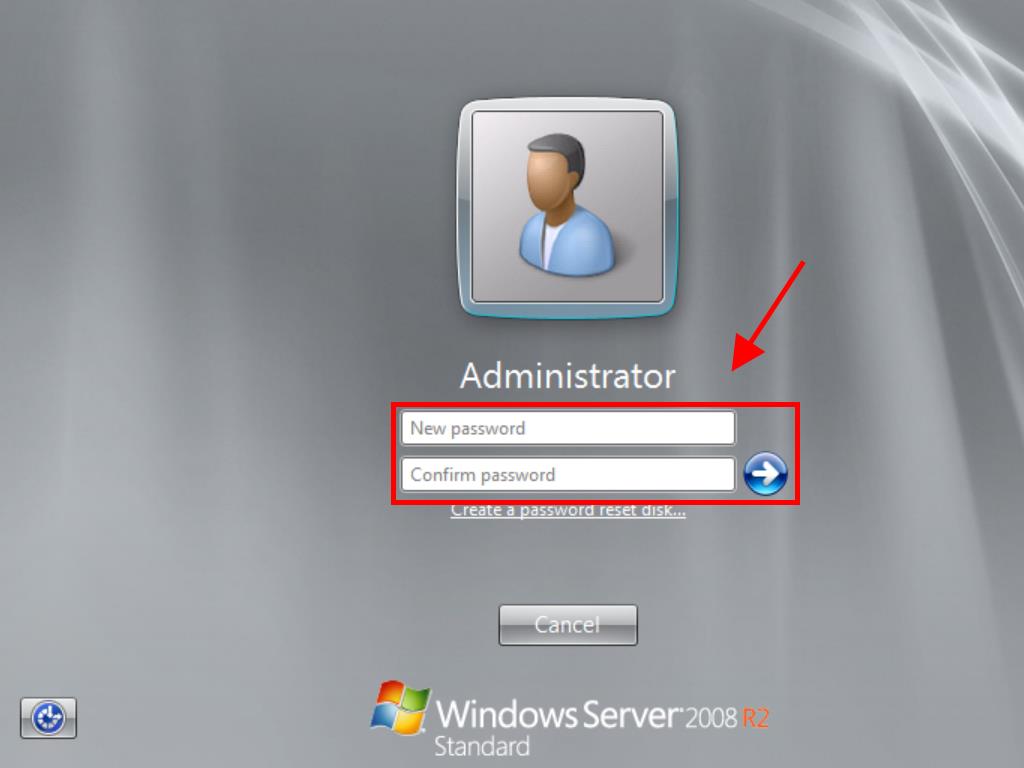
- Enter a password that is easy to remember.
- Finally, you will have installed our Windows Server.

Note: If you restart your PC and the Windows Server installation does not start, you will need to change the boot order in your PC's BIOS settings so it can boot from the USB.
Note: We recommend deleting all partitions on the hard drive for the proper functioning of Windows Server. If your hard drive is new, just click on next.