How do I install Windows 8.1?
After creating a bootable USB drive, follow these steps to perform a clean installation:
- Turn on your PC so that Windows starts normally; insert the Windows 8.1 DVD or USB and then restart your PC.
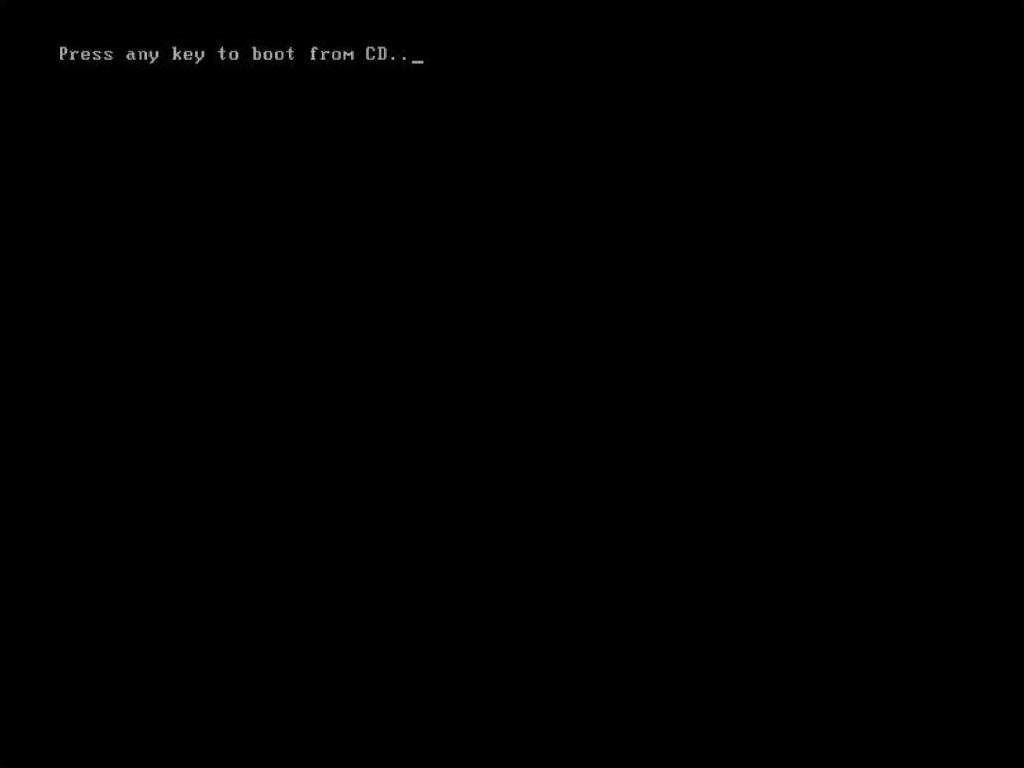
- Your device will boot from the Windows 8.1 USB device. Press any key when the message Press any key to boot from CD or DVD appears.
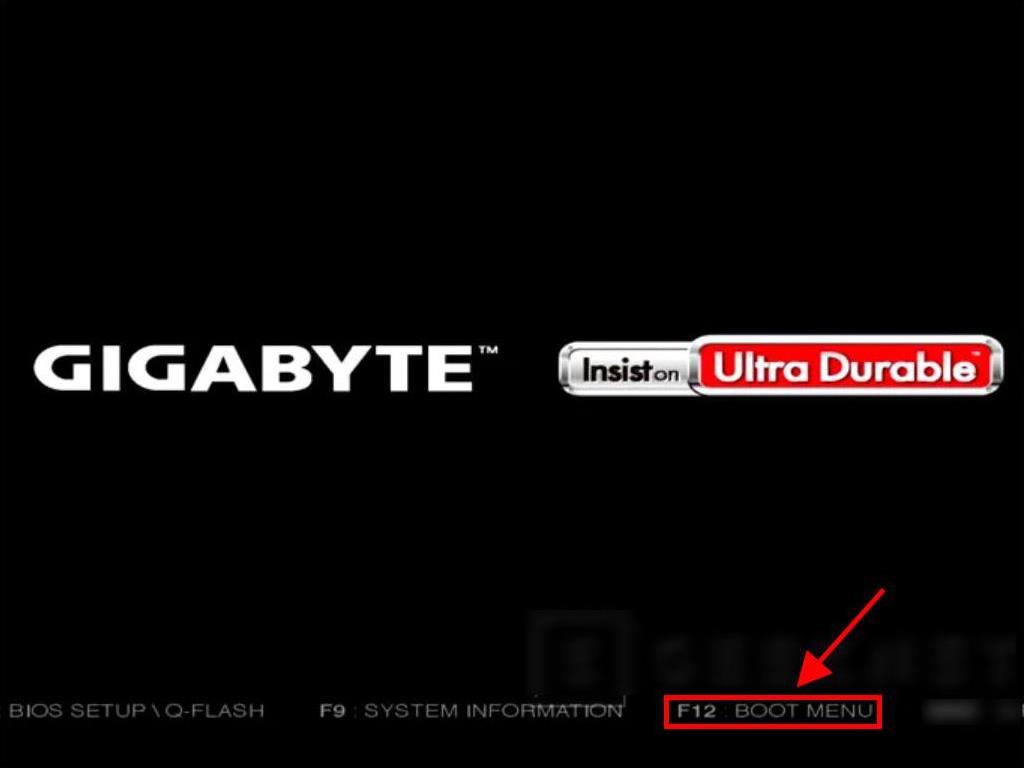
- Restart your PC and when the manufacturer's logo appears, look for the BOOT menu startup key, which is usually F2, F10, F11, F12 or Del, to open the menu.
- Change the boot order to USB.
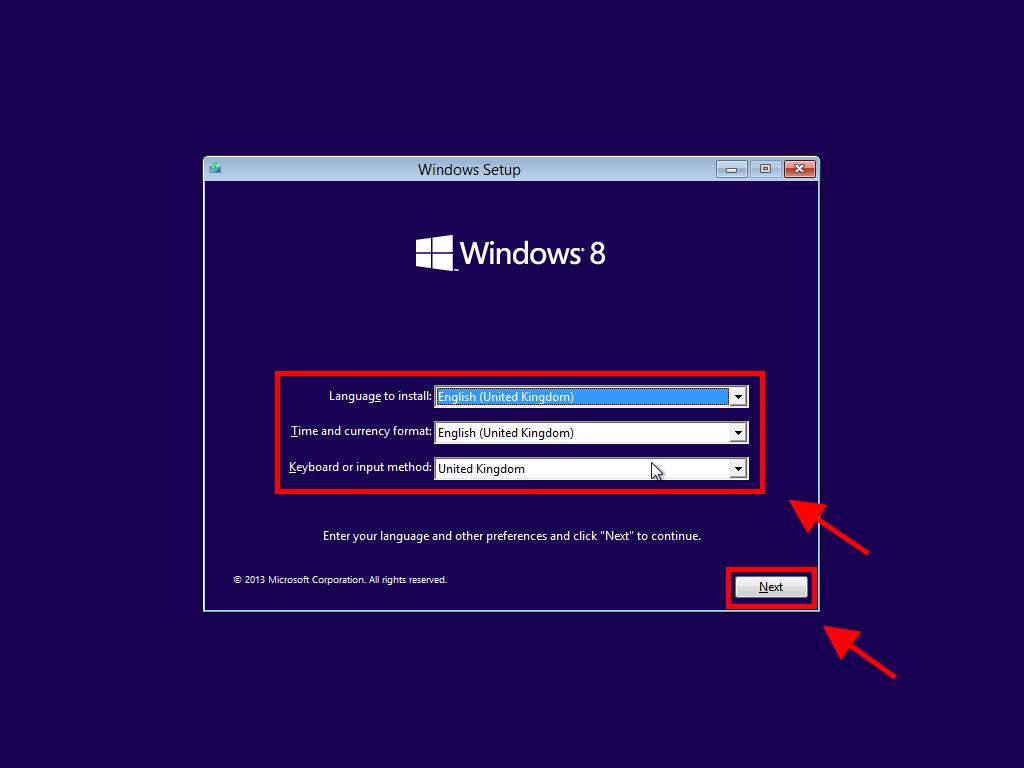
- Once you're in the setup programme, select your language, time format, currency, and input method, and click on Next.
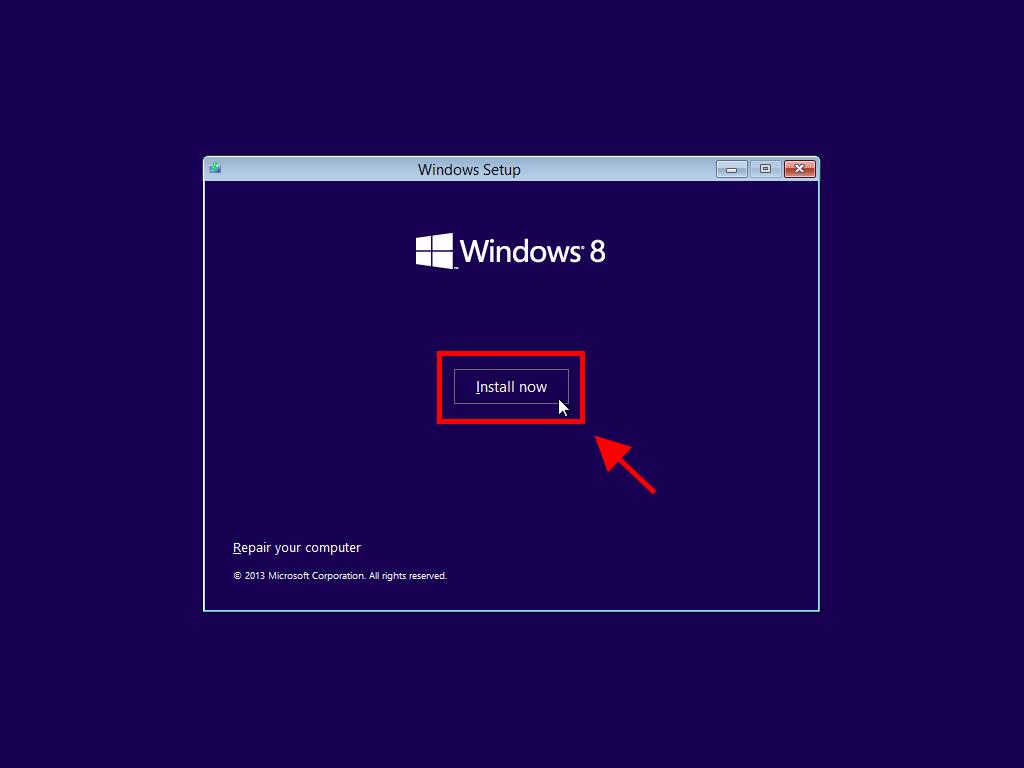
- Then, click on Install now to start the process.
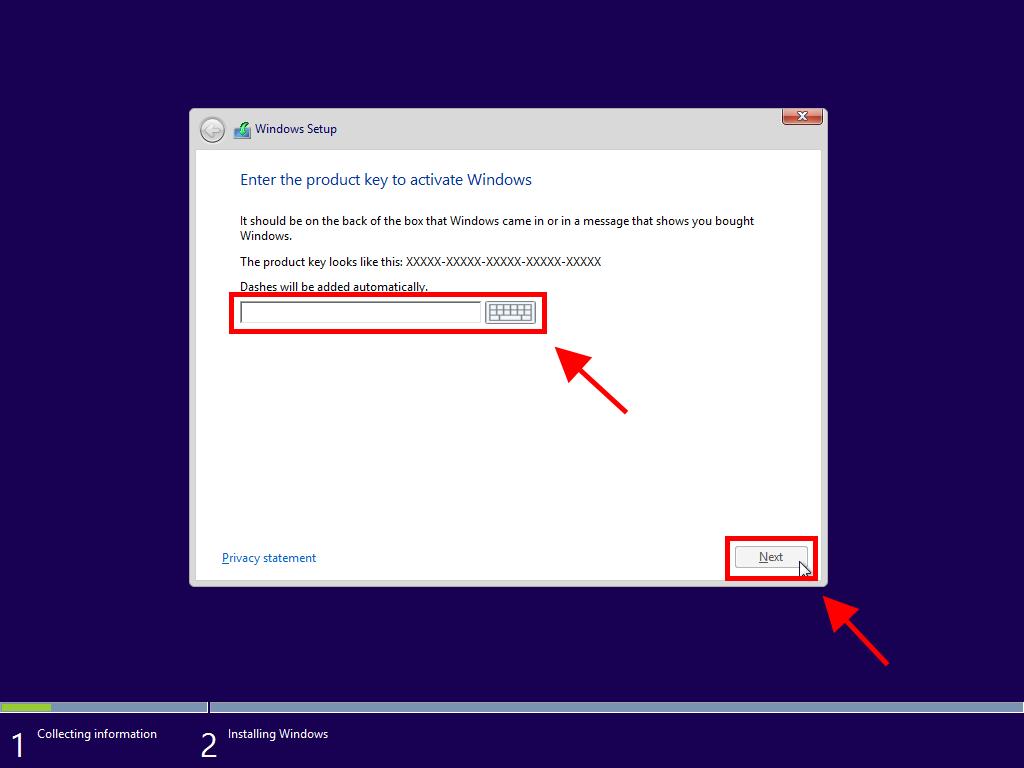
- Enter the product key to activate Windows 8.1 and click on Next.
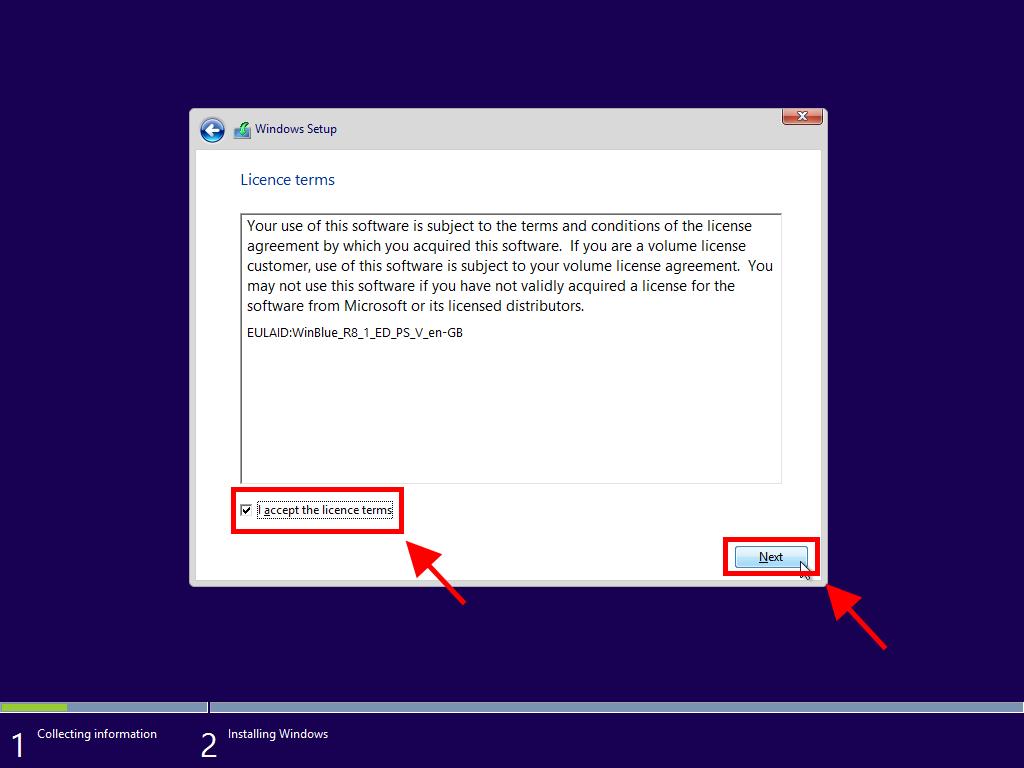
- Accept the licence terms and click on Next.
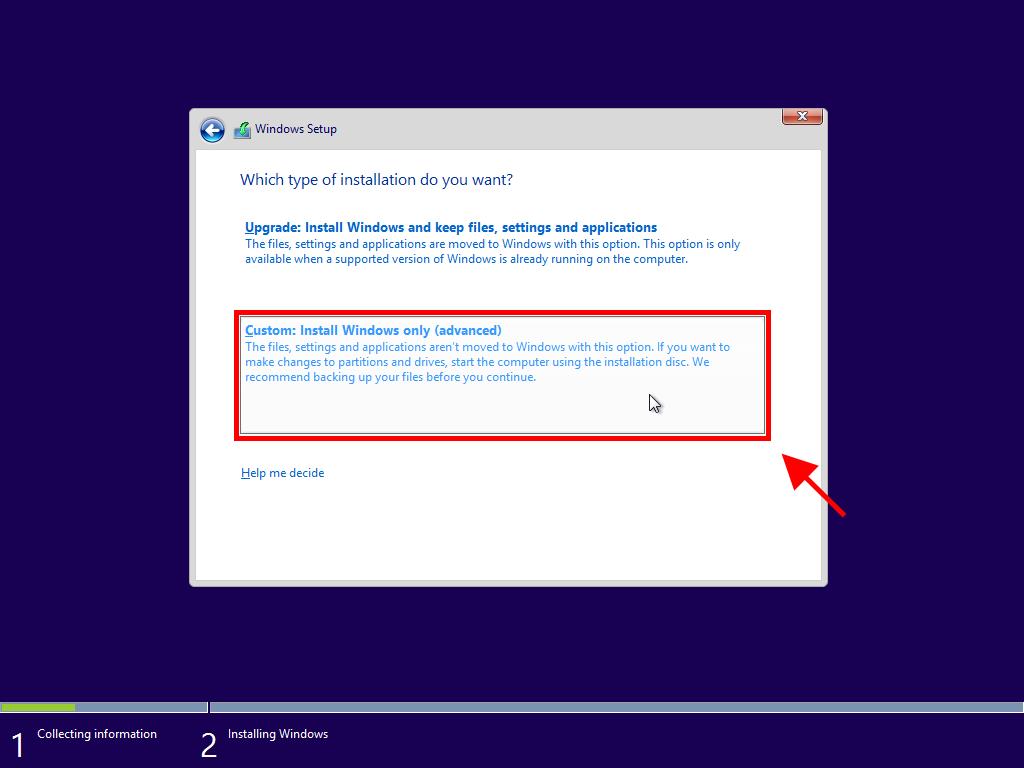
- On the next screen, select Custom: Install Windows only (advanced).
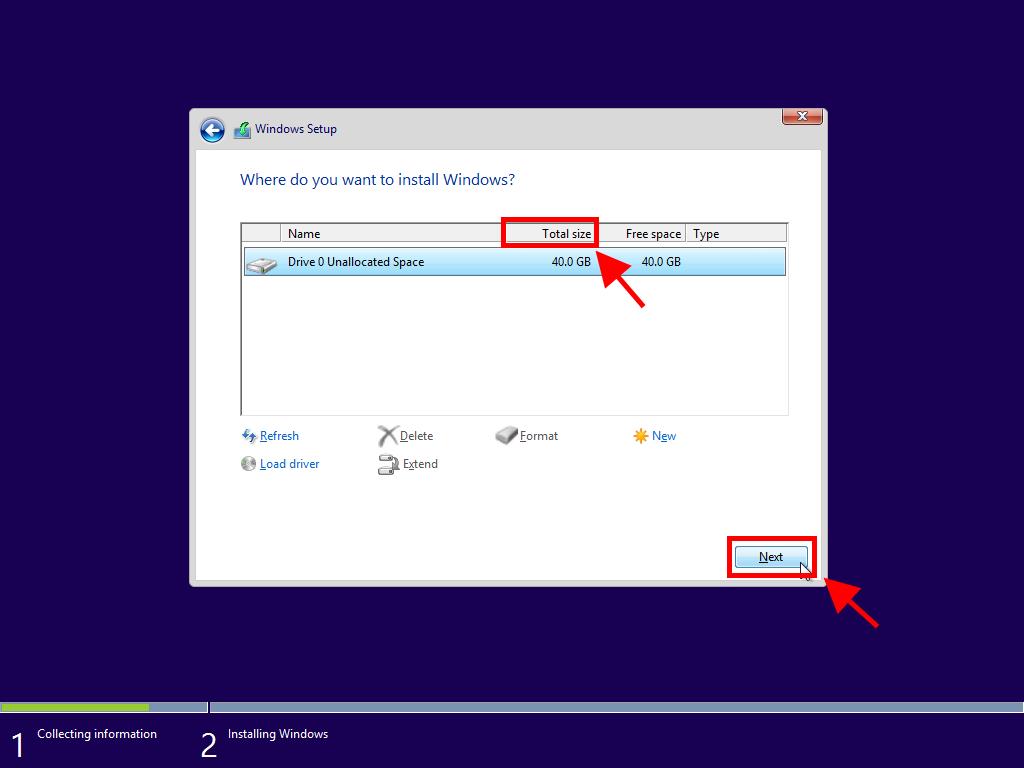
- In the following box, select the disk drive where you want to install Windows 8.1.
- Click on Next and Windows will begin to install on your PC.
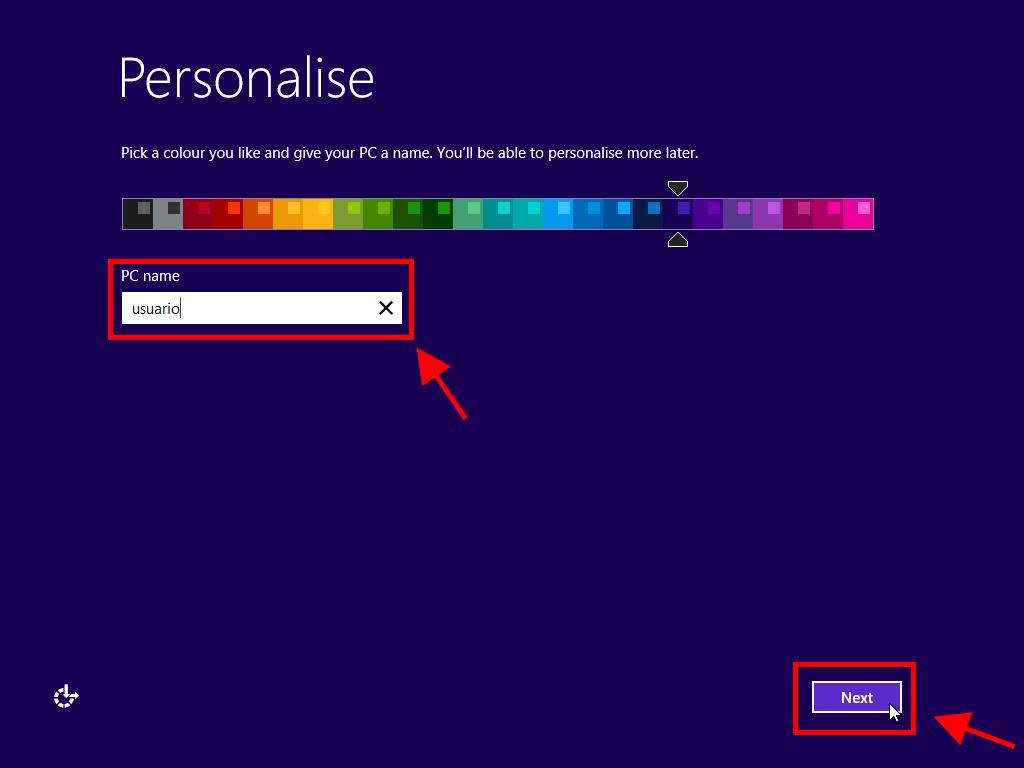
- After several restarts, it's time to customise your PC. You can choose the colour you'd like Windows to appear in and you can also name your PC. Click on Next.
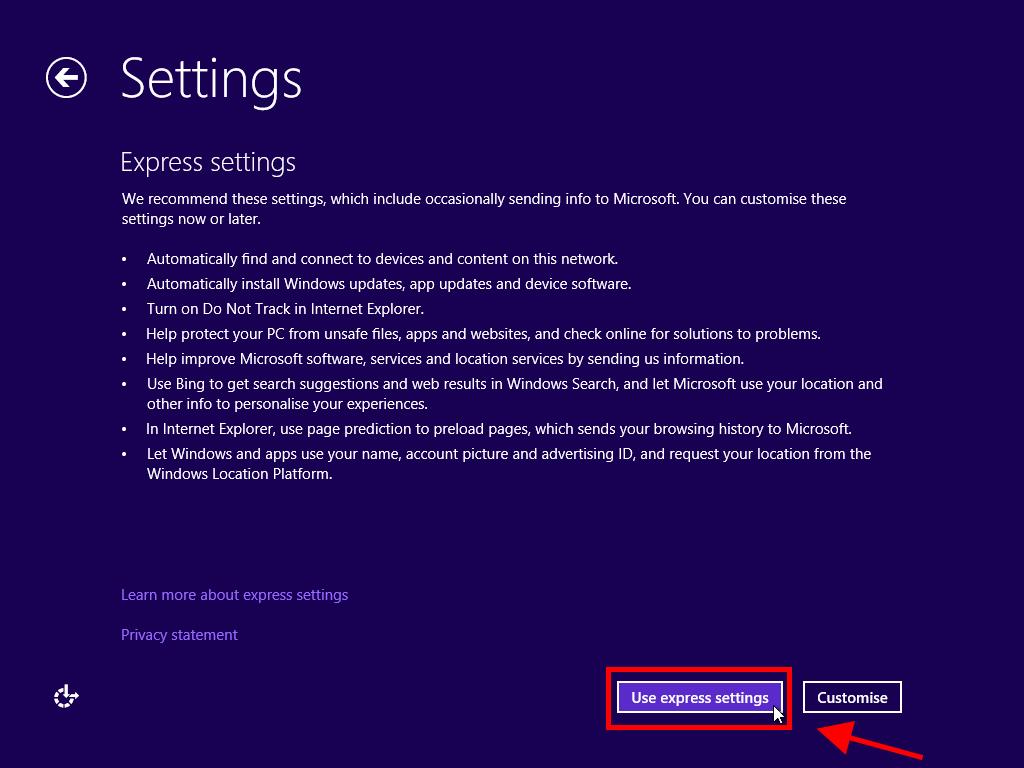
- Then, select Use express settings.
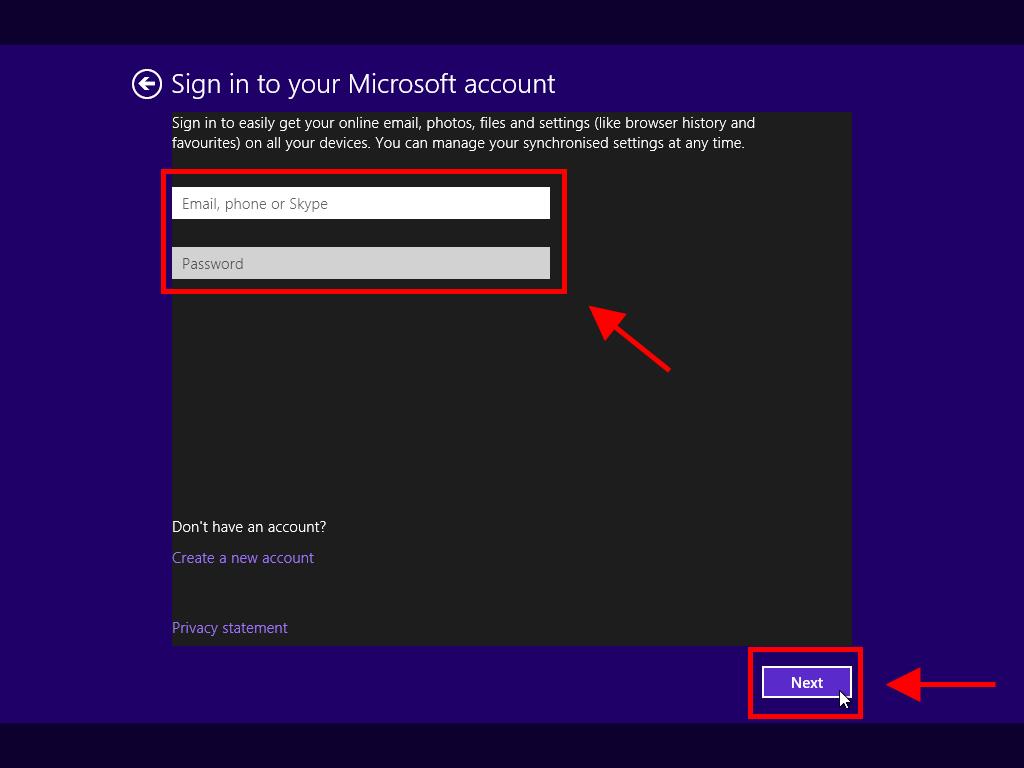
- In the following box, you need to sign in to your Microsoft account using an email address (Hotmail / Outlook / Live).
- Then, click on Next.
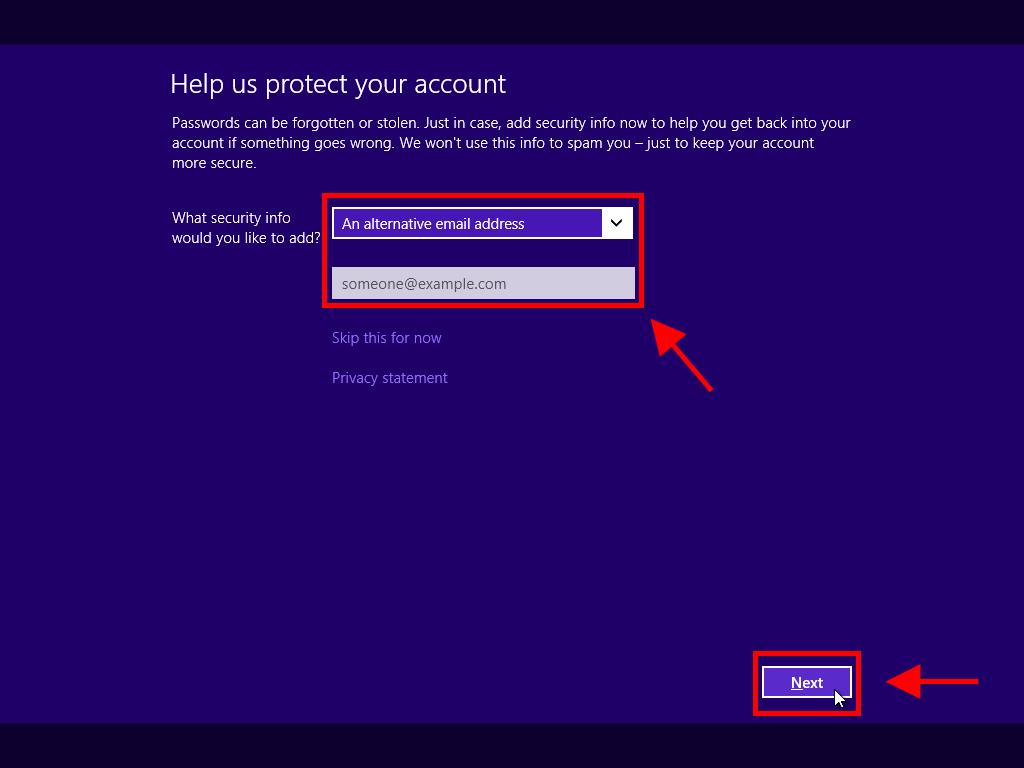
- Add security information to help recover your account if there's an issue and click on Next.
Note: If you restart your PC and the current version of Windows starts, you will need to change the boot order in your PC's BIOS settings so it can boot from the DVD.
Note: To know which hard drive to choose, look at the Total size column and select the hard drive with the most space in GB.
Note: If you don't have one of those emails, click on create a new account.
Note: If you wish, click on Skip this for now and bypass this step.
After this setup, just wait a few minutes and you'll have Windows 8.1 fully installed.
